Neighbours talking over the garden gate has long been a tradition. They share gardening tips, complain about the weather and pests yet are ever eager to discuss their gardens. That is what I had in mind when creating this blog. So stop by my garden gate to find out the latest happenings in my garden.

Happy Gardening!

Garden Gnome
"All my life through, the new sights of Nature made me rejoice like a child." ~ Madame Marie Curie"

Monday, December 31, 2012

The End of 2012

I honestly can't believe 2012 is drawing to a close.  It has been a busy year getting adjusted to our new home and one again doing that rip out, start over thing.  While we did put in three new raised beds this year, next year promises to see a lot of changes.  I've already ordered from Richters and will place an order for live plants as soon as they start shipping in the spring.  I have my orders planned for Dominion Seed House and Stokes.  The end of the holidays and constant company is very close so I expect to be adding to my indoor garden this coming week.

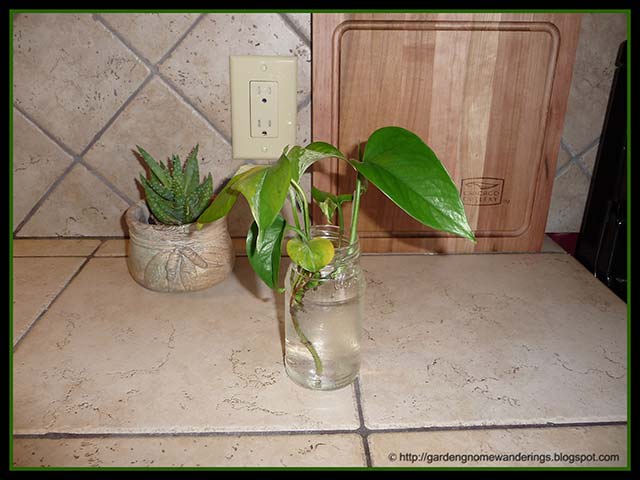
On the topic of indoor gardens, all of my herbs are doing fine as is my avocado plant and lemon trees.  The geraniums I'm over wintering are nice and healthy while the hibiscus keeps rewarding me beautiful bloom even though we were away most of October and December.  This week I plan on starting several more herbs, a few tomatoes, peppers and lettuces for the indoor garden.  It's too soon to start anything for the outdoor garden.  One blog I read reported good results with growing sweet peas indoors and I know pole beans can be grown indoors as well.  I have seeds for both so will start a couple of pots to see how they fare.

So. we say goodbye to 2012 but from a gardening perspective I have a lot of plans in store for 2013.   I really want to expand my indoor gardening and will definitely be focusing on small space gardening outdoors.  I think it is going to be an exciting growing year to come!  I can't wait to share some of my ideas with you.


Saturday, December 29, 2012

Richters 2013 Herb & Vegetable Catalogue

The Richters 2013 Herb & Vegetable catalogue arrived just before Christmas but I didn't have time to browse through it until today.  Richters (located in Goodwood, Ontario) has a wonderful selection of herbs and gourmet vegetables.  Their service is speedy with reasonable shipping costs that ensure your live plants arrive safely.  This year they have added SeedZoo, a project to preserve traditional and indigenous food plants from around the world.  Here is a short video on SeedZoo.


The SeedZoo seeds are sold on a first come, first served basis.  Many of the seeds are from rare and endangered food plants so there is only a few seeds available.  Once sold out the seeds may never be available again.  Home gardeners can help preserve these plants by buying the seed packets ($6 each), growing the plants then collecting the seeds to share with family and friends, much the same way as you do with heirloom varieties.  This is a wonderful way to experience vegetables from around the world that you might otherwise not have the opportunity to enjoy.

I ordered three packets - Hutterite beans, monkey faced peppers and giant Armenian black beans.  I really would have liked to order more but a lot of the seeds are indigenous to  Africa meaning the chances of them doing well here in Ontario, Canada is about slim to none but that doesn't mean I couldn't try.  They really are pricey though at 10 seeds per package for $6 plus shipping and HST.  Still, it is a well worthwhile project and I do hope that many home gardeners buy at least a package or two to support the cause.  More importantly, preserve the seeds and share them!


Saturday, December 22, 2012

Real Verses Artificial Christmas Trees Revisited

'Tis the time of year that many have decked their homes with Christmas trees.  A few years (2008)  ago I wrote a blog post on real verses artificial Christmas trees.  There are pros and cons to both but the conclusion was from an environmental perspective, real Christmas trees are superior to artificial Christmas trees.  All of the original points are still relevant however I decided to revisit the issue to see if anything has changed.

In common:

  • Both real and artificial trees can be on the pricey side.  
  • Both have a cost of acquisition in terms of transporting to point of purchase then to your home.
Real Chrismas Trees:
  • Pro - One of the major changes in favour of using a real Christmas tree is many communities are now offering curbside collection with the tree destined to be turned into mulch.  This mulch is then available to be used in the community as well as any resident of the community.  Some communities charge a small fee for the mulch while others don't charge if you bring your own containers and load the mulch yourself.  
  • Con - Curbside collection is costly in terms of property taxes and associated collection costs (eg. fuel, truck maintenance) even though the actual cost may not be apparent to the resident.  Carbon dioxide and other emissions from the trucks used to collect the trees leave a rather large carbon footprint, contributing to air pollution and reduced air quality.
  • Con - One thing not mentioned in the original post was real Christmas trees need regular watering to prevent them from drying and becoming a fire hazard.  This fact hasn't changed just it wasn't discussed in the original post.
  • Con - Real Christmas trees usually need to be trimmed to fit the space, to create clearance for gifts underneath and balance the tree.  While this not difficult, it is messy and can be tedious.
  • Con - Another thing not mentioned in the original post, real Christmas trees can introduce insects into your home.  
Artificial Christmas Trees:
  • Pro - They do not require any maintenance during use making them ideal for those who want to decorate their home for the holidays and will be spending periods of time away from home. 
  • Pro - One of the biggest pros for artificial Christmas trees is the simplicity.  Simply pull the tree out of storage and set it up.  Some trees are all one piece so set-up is minimal, involving little more than plugging the tree in.
  • Con - Storage space is required and if you think about it, the tree is in storage for a considerably longer period of time than it is in use.  This is something to consider for those living in smaller homes or apartments.


Monday, December 10, 2012

Leafsnap

Have you ever come across a plant that you don't know what it is and want to identify whether it is friend or foe?  Well, I have.  We moved into our new home in September of 2011 and we bought our vacation home in Florida in 2010.  While I am rather good at recognizing plants, I came across some at both of our homes that I didn't recognize.  We also do a fair amount of travelling where I come across plants that I really like and would like to identify them to see if they will grow well at either location.  Until now, I had to rely on manual identification via plant books and other home gardeners.  I've even posted a few unknown plants on this blog to get the help from my readers.  Onto the scene is a brand new app called Leafsnap.

Leafsnap helps you identify a plant by taking a picture of the leaf.  This is an free app available for the iPad.  Once you take the picture (snap it) of the leaf on a white background a number of possible options will appear as possible identifications.  At that point, you can choose the leaf in the database that matches yours for a positive id, name the leaf and save or you can leave it as unknown then show the picture to a local grower who can help you identify it.  This app would be particularly useful when trying to identify plants both in a new home and perhaps around the neighbourhood when planning what to plant.


Thursday, November 29, 2012

The Carbon Dioxide Trick

I picked up a rather neat trick for growing indoors back when I had my hobby greenhouse.  Plants and humans work opposite.  Humans breath in oxygen and respire carbon dioxide whereas plants use carbon dioxide and release oxygen which is why we need plants in our home for healthy indoor air quality.  In my quest to heat the greenhouse the first year, I came across a tip to use a propane heater that emitted carbon dioxide with the cheap fix of burning a few candles.  The plants loved it, rewarding me with beautiful growth.  So, I'm using that trick indoors.

Our home is a five bedroom, two bath executive home which really means it has a lot of square footage.  The problem is, there are only two of us most days so we don't produce the amount of carbon dioxide the plants need.  I have resorted to burning a tea light candle near the plants a couple of times a week.  So far, so good.  The plants seem to be enjoying it with nice, healthy growth.  It is an easy solution to keep plants breathing properly.  The nice thing is, this doesn't cost nor is it difficult to do.  The only thing is you should be in the room when the candles are burning.  Other than that, this trick works like a charm for all plants grown indoors.


Wednesday, November 28, 2012

Edible Plants Suitable for Indoor Gardening

A couple of days ago I wrote about the concept of a continuous harvest by growing an indoor garden.  A wide range of vegetables can be grown indoors year round.  The choice for fruits, on the other hand is a bit more limited.  Many herbs can be grown indoors as well.  Unlike growing outdoors, the indoor environment is a controlled one.  All the necessities for healthy plant growth are controlled so you don't have to worry about drought conditions, adverse temperatures, frost or damaging winds.  The limiting factor with growing indoors is space.  In fact space is a limiting factor when growing outdoors but many home gardeners ignore that especially when failing to consider that little bush they planted is going to become a huge bush at some point.  Indoors, the space becomes more of a consideration.  Unless you have a huge house with a lot of empty space, certain plants like fruit trees or bushes are not going to be possible.  Oh sure, I have three small lemon trees and a small avocado tree but logistically they will likely never produce fruit.  Certain edible plants simply are not suitable for growing indoors but there is no harm in trying.  Here are some of the edible plants I'm or will be growing indoors (successfully grown in the past).  The list does change especially after the holiday season as I start gearing up for the main gardening season and spend more time on my indoor garden.

  • herbs - parsley, thyme, sage, rosemary, chives, basil, mints, lemon balm
  • greens - leaf lettuces, mesclun mix, mustard, spinach
  • vegetables - Jawell mini cucumber, Tiny Tim tomatoes, Tom Thumb sweet peas, Blue Lake pole beans, potatoes, carrots, radish, zucchini, 


Tuesday, November 27, 2012

Growing a Continuous Garden Indoors

Growing edible plants indoors is really not much different that growing houseplants.  The concept is not a new one, dating back into Victorian times with atriums and greenhouses becoming popular in many homes.  Housewives have been growing herbs on sunny window sills for centuries.  Home gardeners have been starting plants indoors under lights for ages and now those systems have become even more popular.  Essentially, the basic requirements of growing medium, nutrients, light, water and temperature need to be met in order to successfully grow edible indoor plants year round.  Logistically, one of the biggest problems with growing an indoor garden is space as all the other growing conditions can be controlled.

There are table top soil based, hydroponics and aquaponics commercially produced growing systems are available but many home gardeners set up DIY systems that take advantage of natural light supplemented with artificial lighting.   It is even possible to have small ponds indoors made rather easily with preformed pond shells.  Think outside the box if using aquaponics or indoor ponds as the fish in the system can be used as food (eg. shrimp, bass) as well rather than decorative (eg. gold fish, rosy red minnows).

Houses are apartments can create growing restrictions based on their orientation and design.  This is our sixth owned permanent Canadian residence.  While we also own a vacation home in the US, we don't grow an indoor garden there.  Of the six homes here, only one was almost ideal for an indoor garden because it was open concept with massive expanses of windows (south and west exposure to a fault) for natural light so supplementing with artificial lighting wasn't really needed.  I am in the process of setting up my indoor gardens.  While it is partially set up, it is very much a work in progress at the moment.  This house has wonderful southern exposure, only one window facing west, a patio door facing east and the rest northern exposure.  So while it is light, bright and airy, actual indoor growing space is limited.  Ideally, I would like to take the other spare bedroom and turn it into a grow space but hubby already called dibbs on it as an extension of the games room.  Here are some of the things I am taking into consideration in establishing my indoor garden:

  • lighting - I'm taking advantage of two large windows with deep windowsills adjacent to each other on the lower level.  One faces south and the other west so there is a lot of natural light. The windowsills are about a foot deep giving plenty of room for lots of pots.   This area of the house is ideal for herbs, starting seeds, growing vegetables (eg. tomatoes, lettuces, peas) and overwintering geraniums.  At the same time the light spills into this portion of the games room making it the perfect spot for larger potted plants to get plenty of natural light. I am in the process of setting up a shelf unit that was initially a small patio greenhouse (4 shelves) as a growing station that will be mainly artificially lit.  Other than that, I take advantage of natural lighting by moving plants around as necessary.
  • heating -  Heating is a non-issue for the most part.  We keep the ambient temperature at 20°C during the winter months with the exception of the period of time we are at our vacation home when the temperature is lowered to 13°C.  The problem with indoor heating is it can be quite drying.  In our previous houses this was a problem that I solved by using humidity trays and misting.  This house has an air exchanger so the air does not get as dry.  I use vent deflectors to keep the heat from blowing directly on the plants.
  • watering - Fruits and vegetables grown indoors require more watering simply because there is not a natural source of water (eg. rain) but at the same time there is less water lost through evapouration due to winds, high temperatures and strong sun exposure.  Overall, plants grown indoors require less water and they should only be watered as needed.  Over watering of herbs, fruits and vegetables grown indoors will cause: mold to form on the soil surface, root rot that will result in the death of the plant, and promote fungal diseases.  Not only is this bad for the plants, mold spores can trigger allergic reactions and asthma. Watering is done by hand but I do take advantage of water globes and self-watering pots to lessen the amount of watering I have to do.  
  • humidity - Plants grown indoors require humidity especially during the heating and cooling seasons, both of which can be quite drying.  Humidity helps to keep the stomata on the leaves clean so the plant can respire properly.  Outdoors this task is done by humidity and rain.  Indoors, it can be achieved by occasionally giving plants a shower and routinely misting them to keep the leaves free of dust that will block the stomata.  I also set up humidity trays for some plants, especially those close to any heating vents.  A humidity tray consists of a shallow plastic tray with a layer of stones covering the bottom to which water is added then the potted plants sit on top of the stones.  
  • fertilizer - Any plant grown in containers whether indoors or outdoors requires fertilizer to replenish the limited supply of nutrients in the soil.  I work in compost, coffee grinds, and used tea leaves into all of my houseplants including the edible ones.  I also use an organic fertilizer.
  • pollination - Plants grown outdoors are usually pollinated by bees and other beneficial insects as well as the wind although the home gardener may also manually pollinate certain plants.  Indoors, there shouldn't be any pollinating insects and while there are air currents in the home, they likely are not strong enough to ensure pollination.  In most cases, manual pollination is required using a small artist brush (dollar store) or q-tips. 


Saturday, November 24, 2012

Over-wintering Outdoor Plants

Overwintering outdoor plants is as simple as bringing them indoors and potting if necessary.  This is an ideal method for having ready-to-use container plants for the following spring.  We spent the month of October at our vacation home in sunny Florida.  Before we left, I gathered up all the potted geraniums, annual herbs, the potted herbs and the hibiscus tree to bring indoors for the winter.  Normally, I bring in a couple of pepper plants and tomato clippings but this year decided not to.

Now, bringing in outdoor plants is not as easy as it sounds.  Logistically, I need to find suitable space for them among my houseplants and continuous garden.  At the same time I have to be very careful not to introduce disease or pests from the outdoor plants to the existing indoor plants.  Complicating the issue is some of the outdoor planters I bring in are rather large, not easily moved around indoors as required for sun exposure and watering.  Here's a few tips for what I did this year:

  • the prep - All plants intended for overwintering were brought onto the deck.  The pots were hosed down well then allowed to dry.  The plants were cleaned up (eg. dead foliage removed, trimmed if necessary) and checked for any insects.  Normally this isn't much of an issue with most herbs but I have found spiders like to spin webs over the openings of certain style self-watering pots.  Pill bugs and earwigs are also rather common in some potted plants.  Once I was sure there were no living bugs on the plants, I brought them indoors.
  • isolation - Even though there may be no signs of infestation on outdoor plants or any newly purchased plant for that matter, all plants new to the house must be put into isolation.  This gives me time to be sure there were no insect eggs or larvae that hatched to cause any kind of infestation.  I put the plants well away from the other plants, in one of the spare bedrooms.  After a two week period, I move the plants to where I think they will do well which means plenty of natural sunlight.
  • large planters - I put the large planters on wooden plant dollies that I get at the dollar store for $2.  They come un-assembled but all that is needed is to attach the caster wheels.  The wheels are a heavy plastic that doesn't mark up our hard flooring so for the price, a rather good deal.
  • watering - I water as the plants need it as well as use self-watering planters and water globe for some of the plants.
  • fertilizing - I wait to fertilize plants brought indoors until they have adjusted to the indoor environment, usually three to four weeks.  I fertilize monthly with an organic fertilizer from that point onwards. 


Wednesday, November 07, 2012

Urban vs Rural

For the past four years we had rural, riverfront property and prior to that semi-rural riverfront property right on the edge of a very small community (about 200).  We got used to the peace and quiet.  Then we moved back into an urban setting and while the neighbourhood is upscale and quiet, I find it a lot noisier than our last house.  Folks here are attached to their power lawn mowers that are about three times as loud as our battery operated lawn mower.  They love their weed wackers and leaf blowers.  It's enough to give anyone a headache!

They are also addicted to using a certain lawn maintenance service to apply obnoxious chemicals on their lawns.  I swear they do the weeding and feeding for our whole street except us.  As a result, here it is into November and everyone's grass is looking quite green while ours is looking a bit anemic.  We will have to address this in the spring but for now I don't mind.  Our lawn was obviously used to being chemically treated, something we do not believe in doing so I will start with a spreading of compost within the next couple of days along with an organic fertilizer.  That should tide the yard over nicely until the spring.


Tuesday, November 06, 2012

Final Grass Cutting for 2012

It is cold out today, a typical grey and overcast November day here in beautiful Ontario, Canada.   The forecast is for clouds breaking for some sun but there hasn't been much in the way of sun for the past few days.  Our front yard and garden bed look so bare as we did a major rip out, getting rid of a couple of umbrella trees, a small maple tree and a foo foo tree.  I don't know the name of the foo foo tree but you cut it right back to where it looks like a giant bone sticking out of the ground during the winter.  The silver birch we planted is doing good although most of the leaves are off of it.  I didn't get around to starting my naturalized crocus idea yet but there might be time before the snow flies.

One of my neighbours is out cutting his grass.  In my opinion, many cut their grass too short for winter.  I think it is best to leave it a bit longer even if it looks scraggly as this helps the grass over winter better.  Our backyard does need cutting but I think the front yard is fine.  He also trimmed up his bushes.  I'm only going to do a raking over where the original front garden bed was then leave it until spring while we decide what to plant there.  If the weather turns nice enough, I'll pull the plants from the west side of the house garden bed.  We are ripping that out as well, starting from fresh in the spring.


Monday, November 05, 2012

A Look Back on Gardening in 2012

It is the first gardening season in our new home and to say the least, it has been a very odd year at best.  When we moved here last September, I was quite excited to discover we had two peach trees and a pear tree.  Needless to say, I had a lot of plans but the weather simply did not cooperate.  Within a very short period of time, my gardening plans turned into a comedy of errors!

Our new house is in an urban subdivision setting with the back of the property bordering on farmland.  A good portion of the backyard is taken up by a 27' above ground pool and decking so the gardens are restricted to the perimeter.  What we thought were mature perimeter beds when we first viewed the house turned out to be a hodge podge of plantings with a very liberal dose of weeds, especially thistle and stinging nettle.  We discovered a few small treasures like garlic, mint, chives and a gooseberry bush but immediately knew we would be in rip-out mode.

I carefully started seedlings ready to be planted in the new raised garden beds when we arrived home from our spring vacation the end of May.  We left on May 5 so the hardier seedlings had been out on the deck for over a week with the more tender seedlings left indoors.  One of our kids did the plant care while we were away for three weeks.  Well, the temperatures heated up and the sun hit that deck with full force so I ended up losing about half of my outdoor seedlings.  The sun turned the window I had several herbs and indoor seedlings into death ray so I lost all the seedings and a couple of the herbs.

When we arrived home we quickly put together two raised PVC beds for asparagus and strawberries along with the larger raised wood bed for vegetables.  Then the weather turned unbearably hot with drought conditions.  As a result of the unseasonably hot weather in March followed by a couple of hard frosts neither peach tree had fruit and the pear tree only had a couple of damaged fruit.  The gooseberry bush gave enough berries for me to make a batch of gooseberry jam.  The mint and chives were enough for garnishes and I dried a bit.  The raised beds were discouraging.  Only now can I see that some of the asparagus and strawberries survived but compared to what I planted, it is a bit discerning.  Surprisingly, the tomatoes did fairly well but definitely not what I'm used to.  The yield and size of the tomatoes was considerably lower than normal.  The peppers jalapeño, super chili, and habanero peppers put on a stunning performance which made up for the lack of performance in the Hungarian banana peppers and nothing from the sweet bell pepper plants.  The dill did not survive being attacked by what I suspect was a rabbit.  The weather was so hot that the lettuce bolted almost immediately upon emergence.  I did end up with four small heads of cabbage so that was a bit encouraging.

What was funny about this growing season was everything was a good two weeks early.  Cucumbers for pickling were still going when peaches started and I was canning peaches struggling to get the corn done that was early then tomatoes hit in mid-August.  I was just into canning tomatoes when my husband was hospitalized for five days so that took my time away from canning and the garden.  After that it was catch-up time until we left for our fall vacation on October 2 not returning until October 23.  The weather was mild except for the effects of Hurricane Sandy.  I managed to do a clean pick a couple of days ago as the forecast was lows of below freezing but aside of a bit of frost on the rooftops, the vegetable bed is still producing although I suspect that will end within the next day or two.

We've done a lot of ripping out this year so I am looking forward to the 2013 growing season here in beautiful Ontario, Canada.  In the meantime, I will enjoy the gardens at our vacation home in sunny Florida when we are there next for our winter vacation.


Sunday, August 05, 2012

Weeding

I am not a huge fan of weeding especially in my vegetable beds.  Weeds in moderation can serve a valuable service as companion plantings protecting vegetables from certain pests.  Many common garden weeds are edible as well.  Weeding is a necessary evil of gardening even if you take the lasie faire approach I do.   Weeds like bind weed can strangle out just about any plant, they make garden beds unsightly and they rob garden beds of nutrition.  The weeds provided a bit of welcomed shade for some of the vegetable plants.  So today, I took one look at my new raised beds that are still struggling with the adverse weather conditions and decided a good weeding was in order just to remove a bit of nutrient competition.  Weeding is always a bit easier when the ground is wet aka after watering or a rain.  The beds look lovely now off to tackle the ornamental beds.

Happy Gardening!  

Garden Gnome
©2006-2012


Tuesday, July 17, 2012

A Frustrating Gardening Season

Everyone is talking about the weather!  We had a two week heat wave in March so the fruit trees blossomed only to hit with heavy frosts after the heat wave.  The frosts damaged the blossoms so fruit production will be low and it took out several local crops that broke ground too soon due to the heat wave.  April was cold with below average precipitation.  May was quite warm with below average precipitation but we were away for most of it.  That meant I had a slow start to setting up new vegetable garden beds.  Within days of being home from vacation the heat waves started.  It's been one right after another broken only briefly by vicious thunderstorms.  Warmer than average temperatures are predicted for Southwestern Ontario for the remainder of July through August possibly stretching into the fall. 

There really is little we can do other than keep the gardens watered.  I've left some weeds in the beds to help shade some of the tender plants like lettuce but even that isn't working well.  I think I will try shade cloth for the beds as long as it doesn't create a heat trap for the plants.  I'm also considering bringing the herbs in smaller pots back indoors as they dry out within a day even with the self watering reservoir.  The deck is a real heat trap.  My husband put up a large gazebo on the deck for shade which really helps shade the house.  Still the deck is too hot for some of the potted plants.  It certainly has been frustrating to say the least!

Happy Gardening!  

Garden Gnome
©2006-2012


Saturday, June 30, 2012

My Ornamental Garden Plans

When we first viewd our new home, the garden that accent the front and sides of the house as well as the perimeter of the back yard appeared lush.  When we moved in, we quickly realized thistles were quite problematic in most of the garden beds.  The plantings were ecclectic, and too much.  Once again we resigned ourselves to ripping out the gardens and starting fresh with the look we wanted.


small garden bed between sidewalk and garage on west side
There is a small garden bed between the sidewalk and the west side of the garage.  There was a large Rose of Sharon that was quite lovely but blocked being able to use the sidewalk without battling branches.  It was simply too large for that location.  We cut it down shortly after moving in.  In the spring, this little garden started coming to life but it certainly wasn't what we wanted.  It was too cluttered.  Adding to the cluttered feel, the previous owners had placed a one row brick retaining wall partially onto the sidewalk pavers around the entire little garden.  A matching but higher wall (not shown) on the other side of the garden runs the width of the house, wrapping around to contain another tree that is too large for its location and then abruptly ends with jagged rock taking over to define the side garden bed.  We are ripping it all out!

small garden bed between sidewalk and garage replanted
Once the garden bed was completely cleaned out, we installed a red cedar trellis.  I have two more of them to be installed either on the west wall of the house or the east wall of the garage.  I planted a clematis that will give a nice impact of colour without impeding sidewalk traffic or damaging the siding.  I finished off the bed with red cedar mulch.  I like the clean, uncluttered look.  I may add a decorative element but want to see how the garden looks once our steps are refinished and the front garden bed is redone. 

We are being hampered by weather between heat waves and storms so not much is getting done in the gardens.  Well, we are getting things done but it's slow going.  I keep puttering away at the ornamental garden beds.  The front garden bed is going to be a lot of work with the removal of a tree, two shrubs and moving all of that brick for the retainer wall.

Happy Gardening! 

Garden Gnome

©2006-2012


Friday, June 29, 2012

My New Square Foot Garden Raised Bed

Yesterday I told you about my new PVC raised gardening boxes in the far top left corner.  At $59.97 each on sale, they certainly were not a cheap way to build raised garden beds especially since between the two I ended up with 16 square feet of growing space.  My husband doesn't like the new PVC beds so he picked up some spruce to build me a wooden raised bed.

newly constructed square foot garden bed
The new raised bed is 4' x 12' x 10" giving me an additional 48 square feet of growing space.  The new bed construction took a couple of days due to weather but finally it was ready for soil.  Again we were delayed due to weather but finally the bed was ready to lay out the grid then plant.

The cost for the lumber and brackets totaled $38.45, considerably less expensive per square foot than the PVC beds.  I've had wooden square foot garden beds last well over five years so if you want neat and tidy raised beds that are easy to set up for square foot gardening, untreated spruce is more than reasonably priced.

new square foot garden bed planted
By then end of the afternoon, I had the bed mostly planted.  Three squares remained unplanted.  I planted bistro salad blend, dill, habs, golden acre cabbage, super chili peppers, muskmelon, watermelon, holy moly peppers, celery and sweet million tomatoes, beefsteak tomatoes, roma tomatoes and lemon boy tomatoes.  Within a couple of days something had got to the celery and dill but the dill is coming back.  I noticed a couple of small grasshoppers so that is not a good sign.  Something is already eating the cabbage but I haven't seen what yet.  I'll just have to keep and eye out to identify the pests then work on control from there.

Happy Gardening!  

Garden Gnome
©2006-2012


Thursday, June 28, 2012

My PVC Raised Garden Boxes

I use a variety of garden bed styles, preferring raised beds but like in ground beds for flower beds.  Shortly after arriving home from our spring vacation, Home Hardware had 4' x 4' PVC raised garden boxes on sale for $59.97.  As raised beds go, these were expensive but I reasoned the PVC would out live the untreated spruce I normally use for my raised garden beds.  The looked slick and a bit upscale.  I bought two of them.

PVC raised garden boxes in cartons
The Canadian made (Home Gardener) PVC beds (Home Hardware, 5010-044) are maintenance free.  They are made of heavy duty PVC that will not rot or rust making them ideal for creating permanent raised garden boxes.  The ready to assemble boxes came in large, moderately heavy cardboard boxes. 

Each box is 4' x 4' x 15", providing ample depth for planting.  The design is such that the box could be moved to another location later if desired making it suitable for those renting.  The snap system would make it harder to disassemble the walls though.

PVC raised garden box pieces
The boxes are easy to assemble using a snap lock system.  There are no instructions included in the box.  Be warned when assembling that each side consists of two PVC boards one of which has a finished top.  Be sure you have the finished top upwards before snapping on an end post.  Given the way the boxes are assembled one side at a time, it would be easy to create the box around a pre-existing structure.

As promised the assembly was very easy.  I put both together the same day.  Assembly required no tools.  I thought there would be some type of bottom as the boxes are raised off the ground a bit.  There isn't.  Basically the box is just a fancy raised frame.

first of two PVC raised garden boxes assembled
I put the assembled boxes along the back fence.  Although the previous owners had a garden in that location at one time the area is over grown and quite weedy.  It is going to take considerable work to make the area look nice.  The first problem is ridding the area of thistles!  Near the top left there is a patch of unidentified plants thought to possibly be in the onion family.

The raised boxes are nice and it would be rather easy to add a hoop house topper.   I planted strawberries in one and asparagus in the other.  I am rather up in the air as to wether I like the boxes as much as I thought I would.  They don't lend themselves well to establishing a grid for using the square foot garden method but they do have the benefit of not harbouring carpenter ants, rotting or rusting.  I will report back on how well I like them at the end of this gardening season.

Happy Gardening!
Garden Gnome
©2006-2012


Monday, June 11, 2012

Hibiscus at Captain J's, Cocoa Beach, Florida


Habiscus at Cocoa Beach, Florida

 Hibiscus at Captain J's
(Cocoa Beach, Florida)
May 10, 2012

We left beautiful Ontario, Canada for our spring vacation on May 8.  Another couple came with us who would also join us in Aruba then head back home on May 20 while we would not arrive home until the early hours of May 30.   We didn't fly out to Aruba until May 12 so that gave us a bit of time for sight seeing around our vacation home area.  The second day there we made a side trip to visit Cocoa Beach and have lunch with one of their kids.   I just couldn't resist taking this picture of their gorgeous hibiscus, wondering if the weather had been kind enough to spare the potted hibiscus I had put just outside the front entrance before leaving for our vacation.

Back in the late spring of 2011 while our previous house was still on the market, I bought two potted hibiscus at Wal-mart.  They were on sale for $5.  I popped them in their pots in two larger containers on either side of the front entrance just to make it look friendly.  When we moved, we brought them with us.  Well my husband took one to the office then proceeded to neglect it so I brought it back home to nurse back to health.  Now this variety of hibiscus doesn't do well below 50ºF so would be considered an annual where we live.  The temperatures dipped in the fall and I lost one of them.  I brought the other in the house to over winter.  Surprisingly, the plant did quite well, rewarding me with stunning peach colour blooms the entire winter.  It survived being attacked by gnats, moving outdoors and me being away.  The tree is quite healthy looking although it is not in bloom.  As soon as it blooms I will share a few pictures with you.


Happy Gardening!  

Garden Gnome
©2006-2012


Wednesday, June 06, 2012

The Heat of the Day

Now that we are back home from our three week spring vacation, attention has been turned to outdoors.  We have opened the pool, bought a few plants and we are getting to know our new property.  I actually discovered a gooseberry bush yesterday!  What I have noticed is this is definitely a hot property.  Unlike our last house, there is very little in the way of shade.  Our last house was so shaded that it was a hindrance and yet this house is the opposite!

While we were well aware of the heat of the day (12 PM to 4 PM) it is not as big of a problem here in beautiful Ontario, Canada.  At the same time, unless working farm labour or other employment that requires you to be outdoors during that time period, many stay indoors if possible.  When it come to home gardening, here's a few tips for dealing with the heat of the day:

  • watering - Do not water during the heat of the day as that can cause plants to burn or become distressed.  Water before to help your garden beds cope with the heat of the day.  Use self watering planters wherever possible and keep the reservoirs filled.
  • take a break - The sun is at it's peak with the strongest UV rays so take a break from your gardening chores.
  • protect yourself - Anytime you are in the garden you should protect yourself with a good sun block with high SPF, long sleeves, wide brim hat and pants and closed toe shoes (preferably boots).  UV rays are not the only enemy in the garden.  There are biting insects, snakes, and poisonous plants so wearing some type of barrier to protect yourself is prudent.  Encounters with snakes are more common during the heat of the day as they are out sunning themselves.  Increased perspiration will attract biting insects and enhance the effects of poisonous plants like poison ivy.  Don't use scented products like hair gel, perfume or anything with a floral scent as that will attract biting insects as well.  
  • provide shade - Set up a shaded sitting area where you can take a break if you have to be out in the garden during the heat of the day.  Take regular breaks so you don't become overheated or dehydrated.
  • stay hydrated - Always carry a water bottle with you to stay hydrated and drink small amounts often.  If your mouth feels dry you are already dehydrated.  Dehydration can quickly lead to heat stroke!

Happy Gardening!

Garden Gnome
©2006-2012


Saturday, June 02, 2012

Call Before You Dig

This is the time of year many home gardeners are tilling up plots, putting new beds in, revamping old beds and planting trees or bushes.  In many areas, utility lines are in the ground meaning there is a very good chance you could sever one of them.  The rule of thumb before digging anywhere on your property is to get free line locates.  In our case, the possible lines include: telephone/satellite, cable tv, water, hydro and natural gas.  If there are any registered easements on your property, chances are good they are for utilities meaning the is a very good probability of finding utility lines in the ground in the easement.  Even if you don't use a service the lines could still be below where you want to dig.  For example, we don't use cable tv but there is a junction box next door only about 18 - inches from the property line.  It's reasonable to speculate that we could possibly have a cable tv line running through our property.  We have hydro, telephone, satellite (phone line), natural gas and water.  Of those the phone lines are quite easy to sever because they aren't buried very deep in the ground. 

In Ontario, Canada the line locates are free which means you should use them before digging.  If you sever a utility line you are held responsible for the repair costs, any resulting damages, you are fined and you be sued. A few years ago, a guy was doing a bit of digging and severed the fiber optics line running between two communities. Both communities were without internet until the line was repaired.  Just imagine the costs and legal penalties if that severed line led to the death of another person which could easily happen if you were to sever a telephone line!  In Ontario, Canada homeowners and contractors are require by law under the Occupation Health and Safety Act of Ontario to ascertain the location of buried natural gas pipes.

In Ontario, Canada use the ON1Call service.  Simply fill out the form online.  If you don't hear from them within 2 business days call 1-800-400-2255.  You may have to call one or more utility companies as well if they are not part of ON1Call service.  Line locates generally are completed within 5 to 7 business days after making your request.  You should not dig before the lines are clearly marked on your property.

Lines will be marked usually with flags and spray paint according the utility service.  The flag colours are:

  • red - electricity
  • yellow - gas, oil, steam, chemical
  • orange - communication, cable tv
  • blue - water
  • green - sewer, storm drain
  • pink - temporary survey markings
  • white - proposed excavation

Happy Gardening!

Garden Gnome
©2006-2012


Friday, June 01, 2012

A Garden Update

I recently wrote about my neighbour's instant garden.  I'm not kidding, it went from barren to lush growth!  We left on May 8 for our spring vacation to Florida, a side trip to Aruba, then back to Florida arriving home side in the early morning hours of May 30.  Gearing up for the vacation, I put what plants I could outdoors but really didn't do much in the garden.  I was envious of my neighbours here (Ontario, Canada) who were busy little beavers in their yards.  Then our neighbours in Florida were busy planting but there was little to do in the way of gardening at our vacation home as we have a gardener there.  I have been itching to get out and start my new garden beds!

Our neighbours here are very much into instant gardens though.  I was amazed to see porches in full bloom, a multitude of hanging baskets and potted plants brightening their homes!  The nice thing is a lot of the plants in our garden beds are in full bloom so now I have a better idea of what needs to be cleaned out and what doesn't.  I bought two 4' x 4' raised PVC garden beds (will post pictures in a day or two) but still have to pick up wood for more raised beds.  I started working on the small garden beds on both sides of the garage.  I'm digging them out completely to start fresh.  I bought 4 red cedar trellises, two will go on the east side of the garage, one on the west side of the garage and I'm not sure where I will put the last one yet.  I want to put clematis on the trellises even though we have four nice looking clematis in the back yard.  Clematis is rather problem free and the vines don't damage the siding.  I have red cedar mulch to finish off these beds but now I'm considering a low growing ground cover.

I lost a few potted herbs and almost a full flat of vegetable plants while away.  Apparently it turned quite warm which caused them to burn on the deck even though some were in self watering planters.  The sun must have been quite strong.  Although I was not happy with the loss, there is nothing I can do about it.  Yesterday, I stopped a nursery and picked up ten various cell packs of vegetables, dill, and two larger tomato plants.  A family member picked up ever bearing strawberry plants, asparagus roots and rhubarb from the greenhouse she works at.  It's been raining quite heavily today so I won't get much done in my gardens or my new project (community garden).

On the community garden front, things are progressing nicely.  We now have a huge water storage tank and a few 50 gal plastic drums with a pump to get water to the back of the property.  Strawberries, tomatoes, cabbage, peppers and beans are planted.  We still have to plant asparagus roots and potatoes.  We are working on getting items like a garden shed, gardening tools, and fruit trees.  Between my own garden and the community garden, I am going to be a very busy gardener!

Happy Gardening!

Garden Gnome
©2006-2012


Friday, May 11, 2012

Frost Damage

Our ADLF was April 15 this year and despite the unseasonably warm weather in March, we had heavy frost through the last week of April.  I don't know how much damage was done to our fruit trees that were in bloom.  The local media have reported severe frost damage to apple trees in the area which is not a good sign at all.  Some farmers have reported frost damage to early emerging crops.  None of this sounds promising.  We can expect higher costs for local fruits and corn.  I doubt we will have a good peach or pear crop either but this is our first year for fruit so I have no previous crop to compare it too.  As long as we get some type of crop.

Happy Gardening!

Garden Gnome
©2006-2012


Wednesday, May 09, 2012

The Instant Garden

We moved here in September of 2011 so really this will be our first year gardening here.  Last fall we watched our one neighbour pull out oodles of pots.  There had to be at least 20 large planters full of dead plants.  Today, I watched as he unloaded about 20 large planters of plants all in full bloom.  Obviously he is not one of those get your hands dirty gardeners.  However, at the moment his front gardens look a lot nicer than mine do and while it cost him a lot more than ours' will, the effect is instant garden.  I must say it does look rather nice!

Happy Gardening!  

Garden Gnome
©2006-2012


Tuesday, May 08, 2012

A Short Word on the Comment Policy on this Blog

All comments on this blog are moderated meaning I have to approve them before they are posted.  I'm sorry if you don't like this policy but it greatly reduces comment spam.  Aside of being annoying, comment spam add no actual content.  Over the past few days some spammers have seen fit to leave comment spam.  Here's a clue, leave comment spam here and your comment doesn't get posted, period and end of!

Happy Gardening!  

Garden Gnome
©2006-2012


Friday, May 04, 2012

Knowing What You Are Up Against

We moved here last September (2011) and while I had no real chance to do much in the way of gardening I have been using sound gardening practices to get this year's gardens up and running.  The first tendency when moving into a new home is to put the vegetable garden in the same place the former owners had it.  However, this is a mistake.  What you really need to do is determine whether or not that is the best location on your property for the vegetable garden.  You need to be aware of any potential problems like poor soil, rocky soil, too many tree roots and critters.  So I have been doing a lot of behind the scenes garden sleuthing!  Here's what I found:

  • natural lighting - The original garden as we saw it was when the sun was getting lower in the sky.  I've tracked it as the sun has moved higher.  It does get good east/west coverage as well as some south exposure.  I'm confident the original garden bed will be a good location for my new raised beds.  In addition to the main gardening area, there are several locations around the perimeter of the backyard that get good but restricted natural lighting.
  • soil conditions - I'm not too worried about soil conditions for most of my vegetable garden as it will be in raised beds.  The perimeter gardens seem to be doing well.  The soil is a bit heavier than I would like so I will be using a couple of soil amendments as I work them up for planting.
  • drainage - We live in what our insurance company deems a high flood risk area even though we are not really close to a natural waterway.  There is a farmer's field behind us so I've been watching it since we move in.  During heavy rainfall the field does flood with large pockets of standing water.  They just put in a tiling system to help with drainage which will only help us.  Our house is elevated a bit from the field and while we have not noticed any drainage issues with our property, it could be an issue.
  • rabbits - I knew with the field we would have rabbits.  We have at least two.  One loves sitting in the front garden bed looking at the herbs on my windowsill while smacking his lips waiting for me to put them outdoors.  The other one simply rang the doorbell, baggage in hand ready to move in.  My new raised beds will be constructed in such a fashion to deter the rabbits.  I'm using 15 - inch raised PVC beds so will add extra protection to keep rabbits out of those beds.  I'm still debating what to use as a barrier for anything planted in the ground so will cross that road when the problem occurs.  We also have to replace our fence so the new design may help keep rabbits out but I doubt it as they can easily dig under fences.  
  • carpenter ants - Carpenter ants are not a problem for actual fruits and vegetables but they are a problem for wood raised beds.  We have a carpenter ant problem that is being treated so I decided to go with PVC raised beds that will eliminate any problems in that respect.
  • yellow jackets - We have four fruit trees.  The ripe fruit attracts yellow jackets in large quantities creating a safety issue.  I covered all of the openings to the pool filter where they were swarming and blocked holes in the two bird houses left behind.  The biggest thing we will have to do to discourage the yellow jackets is keep the fruit picked before it has a chance to become over ripe. 

Happy Gardening!  

Garden Gnome
©2006-2012


Saturday, April 28, 2012

Foiled by the Weather

Gardeners talk a lot about the weather.  It's just a natural thing to do.  Well, I can tell you one thing, the weather has been very peculiar here and if this is what global warming is about, I don't like it one bit!  Our winter was almost non-existent with very little snowfall.  Then in March, our traditional transition month, we had two weeks of very unseasonable warm weather to the point folks were walking around in shorts and we had the furnace off.  Trees began blossoming and it looked very much as if the warm temperatures would continue.  Then they suddenly plummeted, waking every morning to heavy frost and blustery weather.  Our ADLF was April 15 so I held off cutting the grass to as close to that date as possible.  The weather has not warmed to any real degree since the warm spell in early March.  We've experienced horrific, damaging winds that have downed power lines and made driving hazardous.  Driving rain and hail has accompanied some of the winds, but other days it has remained dry yet quite windy.  Here it is almost the end of April with temperatures still dipping below freezing at night.

Things have been slow and frustrating on the gardening front.  There are several plants coming up that need identification and just a lot of gardening work in general to have to do.  Where I want the main growing area for the raised beds is pretty much a disaster.  At one end near the peach trees it looks like onions or garlic coming up and there is a lot of it!  We pulled out an arbor loaded with trumpet vine but didn't get the stumps out before the weather turned.  I started redoing one small garden bed between the walk and garage figuring I could move the plants there but the weather turned so it is at a stand still.  I did buy four new cedar trellises but haven't installed them yet.  Three are for the garage and one for either the back or side of the house (haven't decided yet).  I ordered two 15 - inch high, 4' x 4' raised PVC beds.  I think they will be nicer than my traditional raised wood beds and there won't be the issue of carpenter ants.  They are on sale right now but weren't in stock so are on order with a rain cheque.  I think I will get two more to fill in the one stretch for the main raised garden sections.  I also bought a nice rain barrel on sale but haven't installed it yet.  I have three downspouts in the backyard area that could all have rain barrels or a line of three along the fence with one downspout feeding into one and each one feeding into the next is likely what I will do.  I know I want them raised to use as a gravity fed watering system.

I have herbs in self watering planters ready to go outdoors as well as my hibiscus and several geraniums.  I also have a nice flat of tomato plants ready.  Just this past week I started battling and insect infestation indoors, mainly spider mites but I did spot a couple of aphids.  I'm not sure how the infestation began as no new plants have been introduced in the past three weeks but at any rate they are being treated aggressively with Safer's Soap.  I'm not impressed but should be able to save the plants with a bit of TLC.  And so the 2012 garden season begins...

Happy Gardening!

Garden Gnome
©2006-2012


Saturday, March 24, 2012

Unseasonably Warm Weather with Record Breaking Temperatures

The past two weeks have been unseasonably warm with record breaking temperature in the 70's (F) highs and lows in the 50's (F).  Now that is just unheard of here in southwestern Ontario this time of the year.  Folks are walking around in shorts and sandals.  Our neighbours actually had their AC on yesterday!  Folks have been out doing spring yard clean-up but at the same time some are really pushing it by fertilizing and mowing their lawns.  The reason being this is still March.  In southwestern Ontario our average day of last frost (ADLF) this year is April 15.  That means before that date there is a good chance of a heavy frost and up to that date a 50% chance of a frost. 

Folks are funny in that they cut their grass too early and too late in the season then wonder why they are fighting the rest of the year to have healthy grass.  As tempting as it is, do not touch the mower until after the ADLF for your area.  DO NOT and I repeat DO NOT fertilize, treat for weeds or seed your lawn until after the ADFL.  Lawns cut too early or too late in the season are very susceptible to irreparable frost damage.  So resist that urge to mow too early even if the weather is gorgeous!

Happy Gardening!

Garden Gnome
©2006-2012


Sunday, March 04, 2012

Hybrids vs Heirloom Plants

When it comes to gardening there are two types of plants - hybrids and heirloom.  In order to understand the difference, you need to know a bit of basic genetics.  An heirloom plant is one that has not been modified other than by nature.  It breeds true  meaning if you collect seeds from the plant, the resulting plants from the seeds will be the same as the parent plant (P).  An hybrid is the crossing of two parent plants with different characteristics to result in a unique plant.  Now, let say we cross a plant with white (rr) flowers and a plant with red (RR) flowers.  I'm using r as the recessive allele and R as the dominant allele.  The rr and RR are the alleles for the flower colour so in this case the only way to get white flowers is to have two alleles that are recessive while the only way to get red is to have two dominant alleles.  Two of the same alleles is called homozygous.  A hybrid occurs when you cross two homozygous plants to form a heterozygous plant for that particular trait.  So in this case the cross is RR x rr.  The resulting pink flower plant (F1) is the hybrid that in terms of alleles is Rr and it does not have the same flower colour as the parents (white, red).  What happens if we take that hybrid and cross it with the same hybrid for the next generation (F2)?  Consider a cross between a pink flowered plant (Rr) and a pink flowered plant (Rr).  What we end up with is a 1:2:1 ratio of 1 RR (red):2 Rr (pink):1 rr (white).  In other words seeds collected from the hybrid do not breed true so you may get the one you want (pink) but there is also a chance of getting one you don't want (white or red).

To complicate matters further, plant reproduction can be sexual (seeds) or asexual (cuttings).  Even if you start with a hybrid, if you propagate via asexual methods, the resulting plant will be the same as the parental plant.  However, as we see above if a hybrid is propagated sexually the resulting plant may or may not be the same as the parental plant.  As a home gardener, what this means is seed collection should be done from heirloom plants not hybrids.   These are the seeds you want to keep to grow the same variety the following year.  Some hybrid plants are propagation protected meaning you can collect seeds but you cannot legally propagate via cuttings.  If you want to take cuttings from tomatoes to grow indoors, you should not take them from a propagation protected hybrid tomato plant.  There is nothing wrong with collecting seeds from hybrids but be aware some seed developers have introduced a gene into their hybrids that essential render the plant sterile meaning any seed produced will not germinate.  It would be a shame to collect seeds from hybrids anticipating the same variety the following year only to find you end up with something else (not always a bad thing) or worse yet the seeds don't germinate.  In addition to this, some seed developers have also introduced a marker gene into the plant's genome so they can identify plants illegally propagated.  This is not a huge concern for home gardeners unless you are selling or trading plants that are propagation protected.

I use a combination of hybrids and heirloom plants in my gardens.  I collect seeds from both but tend to focus on seed collection of heirlooms first to replenish my gardens for the following year.  I am careful to label as to whether the seeds were from an heirloom plant or hybrid plant but the reality is plant tags get lost over the growing season so sometimes a clipping gets through that shouldn't.  I'm not selling plants though.  When it comes to hybrids, I try to use hybrids that are not propagation protected especially for tomatoes that I like to grow indoors during the winter months.  Heirloom seeds are the ones you want to collect and protect!

Happy Gardening!

Garden Gnome
©2006-2012


Saturday, March 03, 2012

The Negative Side of Peat Moss

Some plants come in peat pots and the home gardener can start plants in peat pots or use the Jiffy peat pellets.  The premise is peat pots are biodegradable and it is as well as being a nice soil amendment.  They are biodegradable but my experience like many home gardeners is peat pots do not break down over the course of a year.  They definitely do not break down in the turn over time when using the square foot gardening method.  

I personally avoid peat pots if at all possible in preference of fiber pots or reusable/recycled pots.  I have used the Jiffy peat pellets in the past but moved away from using them as well.  My experience with them has been hit or miss with the most common problem being seedlings drying out quickly once they are big enough to have the humidome of the seed starter flat removed.  I also limit the use of peat moss in my gardens.  Peat pots and the use of peat moss is not environmentally friendly as they help to deplete our global peat bogs.  Using reusable/recycled pots and even recycled containers (eg. yogurt cups, toilet paper rollers) is eco-friendly as is using fiber biodegradable pots that do not deplete peat bogs.   They also help with water retention once the humidome is no longer needed.

Happy Gardening!

Garden Gnome
©2006-2012


Friday, March 02, 2012

Common Watering Problems

Many, many problems are caused for houseplants and garden plants by common watering mistakes.  These include under watering, over watering, watering at the wrong time, improper watering and watering on a schedule.  All of these can lead to plant diseases especially those caused by fungus.  They can aid in the spread of plant disease and the leaching of nutrients in container plants. I can't tell you how many times I have gone by a house with the sprinkler going full force while it was raining.  What an absolute waste of resources!  Sprinklers by their design waste water so an eco-friendly home garden doesn't use sprinklers to begin with.  I've talked about watering problems before so here are a few more comments on the subject.

  • under watering - Under watering causes the soil to dry out enough that the plant can wither and die.  Unless a plant's care stipulates it must dry fully between waterings, do not allow plants to dry out.   Avoid this problem especially in indoor or outdoor container plants by using self-watering planters, watering globes or gravity fed self-watering system.
  • over watering - Over watering is a very, very common problem both indoors and outdoors because the home gardener fails to realize the needs of the plant.  Outdoors, overwatering can occur naturally (eg. a week of storms with heavy rains) or by improper watering (eg. watering too much or watering when it is raining).  Over watering leaches nutrients from the soil and causes problems for plants that don't like their feet wet (eg. tomatoes).  It can lead to plant diseases caused by a variety of fungus and cause damping off in seedlings.  Avoid over watering by using self-watering planters, watering globes or a gravity fed self-watering system. 
  • watering at the incorrect time - It is important to water plants as they need the water.  Outdoor plants should be watered in the morning after the dew has burned off, before the heat of the day (1 PM - 4 PM) and early enough they have a chance to dry a bit before the evening hours.  Always water during daylight hours when watering indoors to allow the soil to dry a bit before lights go out.
  • improper watering - Plants should be watered at the soil level without getting the foliage wet.  Wet foliage aids in the spread of plant fungal diseases and cause sunburn on both indoor and outdoor plants.  Indoor plants can benefit from a shower to clean off dust on the leaves but should be allowed to dry fully before returning the plant to its location.  Outdoor plants get sufficient rain to wash off any dust although if you have a container plant in a location where rain will not reach it, a short shower from a watering can can be beneficial.  
  • watering on a schedule - Home gardeners make the mistake of watering on a schedule rather than on the basis of whether or not the plant needs watering.  Watering should always be tailored to the plant's needs.  If in doubt or on vacation use self-watering planters or water globes both indoors and outdoors.  Avoid using timed watering devices (eg. timed sprinkler systems) for watering your plants outdoors as this can result in over watering if it happens to rain.

Happy Gardening!

Garden Gnome
©2006-2012


Thursday, March 01, 2012

Preventing Damping Off

This is the time of year where I have multiple trays and pots of started seeds in various stages from just planted to just emerging to seedling and young plants.  There is nothing more frustrating than to see damping off go through a carefully cared for seed tray.  Damping off is a fungal infection that affects seeds before germination or young seedlings.  The very conditions of warm and wet that encourage seed germination are also ideal for the fungal growth that causes damping off.  Damping off in young seedlings is noticeable by a thinning of the stem at the soil level.  Here are a few tips for preventing damping off:

  • Always use sterilized soil for starting seed.  This can be a commercial mixture or a homemade mixture of 1 part sterilized soil, 1 part vermiculite and 1 part peat moss.
  • Spray the soil with an anti-fungal agent like chamomile tea.  Make two cups of chamomile tea.  Allow to cool.  Pour into a spray bottle.  Use the spray as you would water to keep the soil moist for germination.
  • Use drier germinating conditions with air circulation.  If using the mini greenhouse pots open the vent at the top to allow air circulation.  If using the 72 cell mini greenhouse seed staring trays, prop the lid open for 5 or 10 minutes daily.  If using plastic wrap as a make shift cover, poke a couple of holes in it for air circulation.


Happy Gardening!

Garden Gnome
©2006-2012


Wednesday, February 29, 2012

The Home Gardening Season is Fast Approaching

Today is the last day of February, in a leap year no less.  I can't believe the first two months of 2012 have flown by so fast!  We normally have the furnace on late October to mid-April but this past winter has been extremely mild to a fault.  Just last week a couple of farmers were talking in the local ER waiting room about the lack of cold weather, specifically a hard freeze.  One said that the upcoming growing season would be adversely affected and he is quite correct.  Winter wheat in particular will be affected by the lack of a hard freeze. 

Our hard freeze usually happens in January followed by another cold snap in February and while we still may get a cold snap in March, it's doubtful this year.  Unfortunately, lack of a hard freeze has had more than agricultural affects in our area with a lot of illness especially norovirus.  We've had plenty of precipitation but little to no ice in the local waterways and standing water in the fields.  The days are getting longer and the temperatures will soon be rising giving the mosquitos a head start on their season.  On the plus side, home gardeners will be able to get their gardens in a bit earlier than the Victoria Day weekend, celebrated this year May 19 to 21.  I'd say the ground will be workable by a good two weeks earlier meaning we will have an extended growing season this year.  Predictions are for a hot, dry summer though so that will affect many home gardeners.  Time will tell but at any rate I am in high gear starting seeds.

Happy Gardening!

Garden Gnome
©2006-2012


Sunday, February 26, 2012

Pothos (Epipremnum)

Pothos (Epipremnum) is a beautiful, low maintenance house plant that with white or yellow variegated leaves, or the leaves can be solid green.  It is commonly called devil's ivy or variegated philodendron.   My pothos is about 10 years old.  It grew nicely until we moved to our last house where no plants wanted to grow indoors.  I struggled for 4 years to keep him alive and I do mean struggle.  When we moved here, the pothos started to perk up much to my delight.

pothos in self-watering pot
I repotted the pothos in an EZZY-GRO  self-watering planter then moved him into the entrance way.  This is a bright location with lots of natural light thanks to side lights on the door, an arched window above the door and a beautiful southern exposure.  I added a bit of liquid fertilizer into the reservoir just for good measure.  I took this picture two days after repotting and could not believe the difference.

The depth of the green has been very much enhanced.  Although there are signs that more recovery is needed, it is obvious that my pothos loves his new planter and location.  Each day there are more signs of improvement so I am quite happy!

pothos clipping
When I was repotting the pothos a piece accidently snapped off.  I immediately popped the piece into a jar of water for rooting.  Pothos propagates nicely using the water method or you can stick the cutting into a pot of vermiculite.  If you use the vermiculite method, use a bit of StimRoot® #1 for softwood cuttings.  This is a hormone that stimulates root production.  Either way, the cutting will develop roots.  Once the roots are about 2 - inches  long, the cutting can be potted in soil.  

When my pothos is back to full health, I will start making a few more clippings.  This will give me a few more plants while encouraging new growth on the parent pothos.  In the meantime it is a bit of TLC for the pothos.

Happy Gardening!

Garden Gnome
©2006-2012


Saturday, February 25, 2012

Two New Gardening Finds

This is a wonderful time of the year when a wide range of new gardening finds make their way onto the store shelves.  I have been buying seeds since they first appeared on the shelves a couple of weeks ago.

McKenzi basil seed collection
As a Canadian home gardener I tend to support Canadian plant and seed growers.  While this helps to keep other Canadians employed, there is the practical side to it as well.  Bringing back seeds from the US is quite doable but Agriculture Canada has a problem with bringing in plants potted in soil and understandably so as that is one way plant diseases spread.  Now, Canada Customs will let the plant in but then you have to wait for the plant to be inspected which could take hours!  The second reason is seeds and plants grown in Canada are those that will thrive in our climate.


McKenzie Seeds located in Brandon, Manitoba is Canada's leading seed packet company.  This is the first time I've seen their collections line of pre-spaced seed on discs for a 4 - inch pot.  I bought the basil collection consisting of sweet basil, purple basil, lemon basil, thai basil and sweet basil.  Each disc is pre-seeded ready to use.  Simply fill the pot with seed starting mix then put the disc on top and water.  The disc is a fiber material that will help keep the seeds moist for germination.  The discs are available in pepper, tomato and herb collections as well.  I paid $2.99 which is a bit higher for seeds but potted 4 - inch plants usually go for that price each and I will end up with five potted plants from the package.

individual mini greenhouse pots
The dollar store can be a mecca for gardening supplies, some of them made in Canada but others manufactured elsewhere.  I spotted these individual mini greenhouse pots.  They were 3/$2 so I bought six.  The mini greenhouse pots consist of a 5 - inch pot with a vented, removable clear plastic dome lid.  The height when assembled is nine inches so will accommodate a seedling up to about 4 - inches tall.  What I really like is the venting system so the dome can be completely closed, partially open or fully open. 

I planted the basil collection in the mini greenhouse pots.  Lavender was planted in the last one.  The seed discs were very easy to use as were the mini greenhouse pots.  I will be transplanting the plants when big enough into larger, self-watering pots for the patio.  With proper care the mini greenhouse pots should give a few years of seed starting.  I actually like these enough to buy a few more.  As I type this, the seeds planted in the mini greenhouse pots have sprouted so I'll share their progress.  I am rather pleased with both the discs and pots!

Happy Gardening!

Garden Gnome
©2006-2012


Sunday, February 19, 2012

Repotting Houseplants and Starting Seeds

It's that time of year!  Spring is just around the corner and with our ADLF quickly approaching it is time to start seeds.  I have been busy repotting all of my houseplants into self-watering pots.  I really do like the pots!  The larger self-watering pots for the floor plants are only $7.47 at Wal-Mart which is rather inexpensive compared to some of the regular pots that size (12 - inch).   I used the smaller 7 - inch self-watering pots from the dollar store ($1.25 each) to repot all of my indoor herbs.  My indoor herb collection is lower than I would like.  I currently have two pots of parsley, oregano, lemon thyme, sage, sweet basil, 2 pots of rosemary, and mauve garlic chives.

I am rather pleased that all the geraniums I brought with us when we moved survived!  One of the local schools sold geraniums last year for $3 each which is more expensive than the nursery or other stores but it was for a good cause.  I bought ten to pop into window boxes without actually planting the boxes for instant splashes of colour while the house was on the market.  I used the same size (12 - inch) self-watering pot to transplant three geraniums into each one for two matching planters for the front porch.  That leaves me a total of eleven more geraniums to transplant. 

I also used the same size self-watering pot to repot the Hibiscus that survived the move.  Wal-mart had them on sale for $5.  I bought two of them to pop as is into tub containers on each side of the front door when the house was on the market.  Once the house sold, one went to my husband's office then made it's way to our new house.  The other came directly to our new house where it sat on the deck.   I brought it in as soon as the temperature started dropping as the Hibiscus only tolerates temperatures above 50ºF.  The one that had been at the office was barely surviving so I wasn't surprised when it looked dead after a brief cold spell.  It is still on the deck as I was curious whether it would come back in the spring.

Our ADLF is April 15 so this is the time to start some herbs, tomatoes, peppers and ornamentals.  I did a bit of seed shopping.  My goal this year is to grow as much as possible from seed rather than buy plants but I know I will still buy plants because I can't resist.  I started purple basil, lemon basil, sweet basil, thai basil, cinnamon basil and lavender in individual greenhouse pots.  These are rather neat so I will talk more about them tomorrow.  I bought a 72 cell greenhouse starter kit that will be used for starting tomato, peppers and a few ornamentals.  'Tis a busy time but a rather pleasant way to spend a bit of time while visions of my new gardens dance through my head :)


Happy Gardening!

Garden Gnome
©2006-2012


Saturday, February 18, 2012

Talk to Your Plants

Years ago as a newlywed way back when terrariums were all in vogue there was a movement encouraging talking to your plants to stimulate healthy growth.  Some likely thought that this idea was a sure sign of an unhinged gardener heading to the confines of a padded cell but you know talking to plants has a lot of merits.  I talk to my plants even name some of them.  The benefits of talking to plants is two fold.

First, talking to plants establishes a firm connection between home gardener and the plant.  It is purely psychological for the home gardener but it can a huge physiological effect.  In fact, in some psyc wards of hospitals plants are encouraged for their healing effects psychologically.  Caring for a plant gives a patient a reason to live and much like some pets a plant is never judgmental, but totally reliant on the care it receives.  With proper care and nourishment, a plant will flourish rewarding the care giver with beautiful lush growth.  Living plants in any environment breath life into that room.  They help to purify the air while bringing a smile. 

Plants grown outside give the grower much needed exercise, exposure to the sun which translates into the natural production of Vitamin D, connect the grower with nature and help to lower blood pressure while reducing cholesterol levels.  Even puttering in a garden if only a balcony garden for 15 minutes a day can reap huge rewards physically!  Gardening is a great stress reducer that naturally helps your body relax.  It is only natural at some point to start talking to plants when they have this much effect on your life.

Second, there is actually the science behind talking to plants.  Humans breath in oxygen and produce carbon dioxide.  Plants use carbon dioxide through photosynthesis to produce oxygen which really explains why humans and plants need each other.  Talking to a plant gives that particular plant a little boost of carbon dioxide.  Much like giving a plant extra nutrients via fertilizers, the carbon dioxide will help in the photosynthesis cycle which results in a healthier plant.  And the plant doesn't even care if you have bad breath as long as you give it the carbon dioxide it wants.

So go ahead and talk to your plants.  They will listen then reward you with beautiful, lush growth.  Heck I even name some of my plants but that is another story...

Happy Gardening!

Garden Gnome
©2006-2012


Tuesday, February 14, 2012

Avoiding Plant Stress

Just as with humans, any factor whether external or internal that affects a plant is known as a stressor.  The stressor can be beneficial or harmful or both.  For example, rhinovirus causes the common cold in humans which can be harmful if a secondary infection sets in.  At the same time the common cold helps to strengthen the immune system which is beneficial.  The same is true in plants.  However, when we talk of stress it is usually in a negative way, referring to any factor that is harmful. 

How a plant responds to adverse stressors depends on the health and type of plant.  The effects of plant stress range from minor to severe and may even result in the death of the plant.  If corrected early enough the plant may recover fully or it may be weakened.  A stressed plant is not a healthy plant making them more susceptible to disease and insect infestation.  The following is a list of plant stressors with an explanation and tips to correct.

  • sudden temperature change - Simply bringing a new houseplant from the store to the car then into the house on a cold winter day is enough to cause stress.  Leaves may wither and die.  If the plant is place in a warm, sunny location in the house then watered well new growth should appear but the old damaged growth will not recover.  It should be carefully trimmed from the plant.
  • extreme temperatures -  Plants exposed to too hot or too cold of temperature even briefly are adversely affected and often will die.  In general, keep houseplants within your normal household temperature comfort zone (68ºF to 72ºF).  If frost is forecast, cover outdoor plants and bring potted plants indoors.  Extreme summer heat is difficult to avoid for outdoor plants.  You can use shade cloth to help cool as well as move potted plants into the shade.  If there is a heat wave be sure to keep all outdoor plants well watered especially potted plants.
  • incorrect watering  - One of the most common mistakes home gardeners make is with respect to watering.  They either over water or under water, both of which can kill the plant.  Over watering can cause mold in the soil, mildew on the leaves and root rot.  It makes a plant more susceptible to fugal diseases and will cause dampening off in seedlings.  Over watering will cause nutrients to leach out of container planters including raised beds.  Under watering will cause a plant to wither, drop leaves and kill the plant if not corrected immediately.  Ideally, both indoors and outdoors keep the soil moist but not wet.  When pinched the soil should just hold together.  Some houseplants like African violets are susceptible to water damage on their leaves so should always be watered from the bottom.  In general, it is better to water the soil not the leaves.  Wet leaves spread plant diseases.  Water droplets on the leaves serve as mini magnifying glasses causes burn marks on the leaves on sunny days.  Don't water outdoor plants after dusk or during the heat of the day (1 PM to 4 PM).  The exception to this is emergency water if a plant is obviously heat stressed.  Move the plant to a shady location then water the soil well.  Prevent watering problems in container plants by using self-watering pots.  Use a soaker hose for garden beds outdoors.  Mulch is your best friend in helping to conserve water in your garden beds while preventing them from drying out.  Choose a mulch that will naturally repel problematic insects (eg. red cedar) and avoid those that will create other garden problems.
  • fertilizing - Incorrect fertilizing or too much fertilizer will cause fertilizer burn.  The plant may not survive.  Do not fertilize container plants potted in soil containing slow release fertilizer.  In general it is better to fertilize every 2 to 4 weeks if using granular fertilizer.  A small amount of liquid fertilizer can be added to the reservoir of self-watering pot. 
  • chemical exposure - Chemical exposure can very much adversely affect plants indoors and outdoors.  Exposure can be accidental or on purpose.  Outdoors most chemical exposure aside of herbicides is accidental, often caused by over spray drifting from one property to another.  If your neighbours are spraying for weed control it may affect your garden beds.  The problem is unless you know they are going to spray, it is difficult to protect your plants.  If you know, they are going to spray simply protect via sheeting, gardener's cloth or even tarps while they are spraying.  Once they are finished spraying remove the protective cover.  Over spray can come from salt trucks in areas where snow removal is necessary and home owners can cause salt burn by using salt to melt ice on their property.  In areas where homes back onto farm land as ours does, over spray can come from the farm land when herbicides and fertilizers are applied.  Lessen this exposure by privacy fencing or plant a row of cedars along that property line.  Nicotine is quite toxic to plants as well.  I lost a rhubarb plant when a house guest emptied the ashtray beside it.  Rhubarb is almost a weed that when established is quite hardy yet the nicotine killed it and nothing would grow in that spot either.  Houseplants are exposed to chemicals via household cleaners.  Years ago, I removed the wax from the kitchen floor using household ammonia.  Not only did I damage my lungs, the green in most of my houseplants turned turquoise and most did not survive.  I lost most of my window garden plants and several floor plants.  That served as a very valuable lesson as to how dangerous household cleaners even those used for natural cleaning can be.  Avoid all harsh household cleaners.  Use baking soda, soap, vinegar, household ammonia (sparingly and with window open) and rubbing alcohol for household cleaning. 

Happy Gardening!

Garden Gnome
©2006-2012


Monday, February 13, 2012

Using Fertilizers

Yesterday I discussed what fertilizers are and understanding the numbers on the label.  If you recall, fertilizers are either organic or inorganic and are labeled with the N-P-K content but some may also include the S content in the form of N-P-K-S.  It is important to choose a fertilizer based on the plant's needs.  If you want a nice, bushy plant with lush greenery, choose a fertilizer high in nitrogen (N) content.  If you want a plant with good fruit development and a strong root system, choose a fertilizer high in phosphorous (P).  If you want a plant with beautiful, showy flowers, choose a fertilizer high in potassium (K).  Don't forget the importance of the other three macronutrients (calcium, magnesium and sulfur) or the micronutrients boron, chlorine, copper, iron, manganese, molybdenum and zinc.

Fertilizers are available in liquid and granular forms.  You can also buy pressed fertilizer spikes that are pressed or pounded into the soil.  Liquid fertilizers feed the plants upon application so need to be reapplied at regular intervals.  Pressed fertilizer spikes and granular fertilizers are slow release fertilizers.  Once applied they will feed the plant then slowly release fertilizer for a couple of months continuously feeding the plant each time it is watered.  There are benefits to using either.  Soil amendments like compost will also continuously feed the plant as they continue to break down.  If you are busy or are away from home for extended periods, the slow release fertilizers will keep your plants healthy without the extra attention.  If you use self-watering planters, liquid fertilizers will achieve the same goal when added to the reservoir water making your container plants very low maintenance. 

The use of inorganic fertilizers can cause the depletion of micronutrients (trace minerals) in the soil.  This is more of a concern for those growing in traditional garden beds.  Some soil amendments (eg. mulch, compost, leaves) are great inexpensive fertilizers.  Fish or manure tea is a wonderful, inexpensive organic fertilizer for container plants.  Other soil amendments (eg. manure, straw) are also good but can cause problems.  For example, manure can cause fertilizer burn if applied heavily and straw will introduce more weed seeds than any home gardener wants to deal with.  Fertilizer burn also occurs due to over fertilizing.  Leaves will brown and in some cases the plant will die.

I personally prefer to use organic fertilizers on all edible plants.  I do use inorganic fertilizers on ornamental plants and houseplants grown in containers but use organic fertilizer for any ornamental grown in actual garden beds.  I use organic oil amendments like compost in my container plants both indoors and outdoors.  When I plant tomatoes and peppers I always add epsom salts (magnesium sulfate) to the hole then monthly thereafter and I use epsom salts for my plants in containers.  I also use organic or inorganic fertilizers for all plants I grown hydroponically including clippings being rooted in water (eg. impatiens, tomatoes, pothos, ivy) with organic fertilizer used for all edible plants.

Fertilizer should be applied every two to four weeks, bi-weekly for container plants including raised beds and weekly if growing hydroponically.  You can fertilize every time you water especially for container plants.  In this case, you use a very dilute fertilizer solution.  You can also use soil amendments that will continuously feed your container plants.  Do not fertilize if using a potting mixture with a time released fertilizer or on a newly purchased plant with a time released fertilizer in the soil.  A slow release fertilizer can be recognized by the appearance of small round balls that will be green, white or brown.  If a plant is diseased or is infested, treat first then fertilize lightly.  Fertilizing will help the plant recover.  If you are using self-watering planters, add a dilute fertilizer solution to the reservoir

Never fertilize a plant in dry soil!  The thirsty plant will take up too much fertilizer when watered causing damage to the roots and fertilizer burn.  When applying any fertilizer with the exception of mulches, compost and leaves always water first then apply the fertilizer to prevent fertilizer burn.  Don't over fertilize but in the event if you accidently over fertilize a plant in a container, flush with clear water to help remove the excess fertilizer.  This will minimize the damage but you can still expect a bit of damage to the plant. 

Happy Gardening!

Garden Gnome
©2006-2012