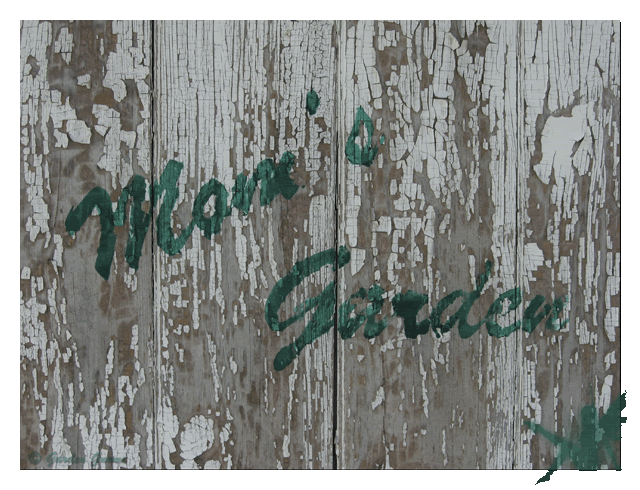
Neighbours talking over the garden gate has long been a tradition. They share gardening tips, complain about the weather and pests yet are ever eager to discuss their gardens. That is what I had in mind when creating this blog. So stop by my garden gate to find out the latest happenings in my garden.

Happy Gardening!

Garden Gnome
"All my life through, the new sights of Nature made me rejoice like a child." ~ Madame Marie Curie"

Monday, December 31, 2007


Happy Gardening!

Garden Gnome
©2007


Monday, December 24, 2007


Happy Gardening!

Garden Gnome
©2007


Tuesday, December 18, 2007

Birdfeeders

There isn't a lot of actual gardening going on this time of year but that doesn't mean thing are not happening in the garden. I attract birds to my gardens year round using plantings and feeders. Birds are natural predators to some insects that can be a nuisance in the garden. The essentials for attracting birds into the garden are food, water and shelter. These remain the same regardless of the season but in colder climates become more important as the temperatures drop. Natural food supplies and water become scarcer for our little feather friends.

Our new gardens are surrounded by mature landscaping consisting of a lot of cedars along the outer perimeters. The cedars provide a lot of shelter and nesting sites for the smaller birds like the house sparrows (Passer domesticus), house finches (Carpodacus mexicanus), dark-eyed juncos (Junco hyemalis), black capped chickadees (Poecile atricapillus) and nuthatches. Larger birds enjoy the shelter as well.

Feeders

I have four feeders each designed to attract different birds and I always put a little seed on the ground for the ground feeders. One problem with bird feeders is they can attract brown-headed cowbirds that are parasitic (takes over other nests removing the eggs) and grackles. Both are annoyance birds that come in larger flocks, stripping the feeders and chasing off the smaller song and beneficial birds. One way to control both is by the choice of seed offering (1) and design of feeder (2). Finches, sparrows and wrens like Niger seed in tube feeders (2) yet grackles and cowbirds don't care for this seed. Squirrels will leave Niger seed alone as well. Safflower seed is enjoyed by cardinals, sparrows and other small birds yet grackles and cowbirds leave it alone. So if grackles and cowbirds are a problem, use Niger or safflower. Definitely stay away from anything with corn in it if these birds or rodents are a problem. Squirrels will go after anything with corn, sunflower seeds or peanuts in it. But bluejays love peanuts so control can be through timing or the design of the feeder. I've yet to see a feeder that a determined squirrel can't get to so timing really is the best method.

Be sure to offer one or more suet blocks during the cold weather months. These provide higher fats the birds need during the winter. Quite often squirrels and larger birds will try to get to the suet and while they may get a little the wire suet hangers are rather effective at keeping the suet safe for the smaller birds. It is also important to offer a fresh water supply throughout the winter months. Some use a bird bath heater to keep the water from freezing. I put out a fresh bowl of water each morning and change through the day if need be.

Mourning Dove

I have to admit a love/hate feeling about mourning doves (Zenaida macroura). Their soft cooing is rather pleasing and they provide the ground clean-up crew under the feeders. They eat almost exclusively seeds so aren't of huge benefit to the home gardener. They aren't aggressive so there shouldn't be much of a problem. Well, they are about the next best thing to a pigeon! They are dirty birds. They have several broods a year. Once established and it is almost impossible to discourage them from becoming established, the only thing you can really do is tolerate them. Apparently some hunt them as a game bird but that would take a lot of effort. So I just let them be. The mourning doves enjoy the coniferous trees surrounding our property. They started me a few times as I walked past only to have several of them fly out. Now I'm used to it.

Sharp Shinned Hawk

A well balanced bird population in your garden will include predators like the Sharp Shinned Hawk (Accipiter striatus). The Sharp Shinned Hawk is 10 - 14 inches long with dark gray back, a rusty-barred breast, a slender square-tipped tail. I was elated to see this hawk visiting our gardens (December 16, 2007) since we've only been here five months. My husband was not simply because he has dealt with the wrath of hawks in the past. Sharp Shinned hawks are rather fond of mourning doves. However, hawks will certainly be encourage in our gardens as a natural rodent control. Mice have been an indoor problem and while the voles have not been problematic indoors there is a rather large population of them. The English Ivy ground cover encourages both rodents. Hawks will keep both in check eliminating the need to resort to poisoning or traps.

This time of year, don't forget your feather friends. They will reward you by visiting your garden year round!

Happy Gardening!

Garden Gnome
©2007


Monday, November 26, 2007

Seed Catalogues


The weather has turned cold, grey and rainy with bouts of wet snow flurries, definitely not gardening weather. Walking to the mailbox isn't as enjoyable. The walk back to house was enjoyable Friday despite the nasty weather. I had the new Stokes catalogue safely tucked under my arm.

Seed catalogues always bring a bit of sunshine on the dreary, cold days. I'll read through them, dog ear pages and make lists of what I want several times before it's time to order for seed starting. Garden planning helps the winter days pass a bit quicker. They hold the promise of next year's garden. The pictures are bright and enticing. However, seed catalogues are much more than that. They are a valuable resource that not only show what the fruits, vegetables and flowers will look like but give a lot of information on the varieties.

So if you haven't ordered your seed catalogues yet, it's time to do so. That way you will have them to drool over after the holidays while there is still a blanket of snow on the ground.

Happy Gardening!

Garden Gnome
©2007


Wednesday, October 31, 2007


Happy Gardening!

Garden Gnome
©2007


Monday, October 15, 2007

Blog Action Day - Square Foot Gardening & The Environment


Today over fifteen thousand blogs with twelve million readers will be blogging on one topic - The Environment. Each of my blogs are participating, each from a different perspective so be sure to read them all.

Square Foot Garden Bed
2006

If you have been reading this blog you will know we moved here in late June so have not set up the new vegetable and herb beds. When deciding on an environmental topic for Blog Action Day, I decided to revisit square foot gardening. I've used the square foot gardening method combined with companion planting for a number of years to grow organically. My new beds while not in a formal garden setting as my last garden will be planted in the same method. It is one of the most environmentally friendly style of gardening.

The method was the brainchild of Mel Bartholomew. Square foot gardening is based on gardening in raised beds using a grid system for form square feet. Herbs, vegetables, fruit or flowers are planted in each square based on the recommended density. When one square is harvested, it is replanted to keep a succession of crops. Often a small amount of soil is removed during this process and replenished with fresh soil so the soil is constantly being turned over creating a no till method. The soil is amended as needed with an emphasis on organic matter. Garden beds set up in the square foot method quickly set their own cycle. They are very easy to maintain!

The square foot bed pictured is one of the eight beds from my previous garden. A small portion of the herb bed is also shown. Plants are encouraged to grow upwards using trellises or other types of supports. What is amazing is the amount of food that can be produced in such a small area using this method. A typical square foot bed will produce the same harvest as a traditional row garden in 20% of the space. The raised beds and grid can be made from recycled materials as well. Old window blinds are ideal for constructing the grid, keeping them out of the landfill. All of these factors result in an environmental win-win situation. In many areas workable land is becoming scarce. Urban lot sizes in many cases are too small to garden traditionally. Digging a garden in rental units is often not allowed but the design of the raised bed is such that they be placed on legs and taken with you when you move. The method is ideal for those with only balcony space as well.

Square foot gardening is the ideal, environmentally friendly choice for anyone wanting a high yield garden in a small space!

Happy Gardening!

Garden Gnome
©2007


Wednesday, October 10, 2007

Nasturtiums


Nasturtiums
October 7, 20007

When we moved here in June I was not expecting any edible plants so I was quite pleased to discover strawberries and parsley. A few weeks ago I noticed the greens of nasturtiums. When they began flowering I was elated. I had planted nasturtiums a couple of years ago in my old gardens. For some reason they did not reseed so I planted them again. With the move, the idea of nasturtiums was put off until next year when I plant the new herb and vegetable gardens.

Nasturtiums are herbs that have a decorative foliage with brightly coloured edible flowers. The blooms on mine are orange and yellow with deeper orange centres but they can range from a creamy yellow to a deep rust with colours in between. They spead easily and for the most part like most herbs are rather problem free. While snails do not seem to bother nasturtiums I do know from experience that slugs like them. I harvested several slugs from the nasturtiums the other day in the early morning hours. That is the only problem I have had with them. They make ideal companion plants for almost all vegetables and herbs with the exception of fennel.

Nasturtiums will self seed in milder climates and will quickly take over any area where they are planted. The flowers have a sweet, peppery taste that is well suited for salads and vinegars. The plants grow well in partial sun but prefer full sun and can be either compact or trailing. My plants appear to be compact growing in four locations all partially shaded. I have the problem of not knowing whether the previous owner planted them this spring or whether they were already established. I think from the pattern that they are established but I will not know for sure until next spring.

At any rate do consider planting these lovely herbs. Their flowers are gorgeous and tasty. They are sure to please making a wonderful addition to your gardens.

Happy Gardening!

Garden Gnome
©2007


Monday, October 08, 2007


Happy Gardening!

Garden Gnome
©2007


Wednesday, August 29, 2007

Laying Sod

Note: This is a modified entry from my homemaking blog. The pictures are the same but I have added or deleted parts of the descriptions. There may still be some overlap but there will also be more detailed information.

When we decided to by this house we had the main goal of buying waterfront property for family use. If you have read any of my other blogs you will know what a strong emphasis we put on family. We loved the look of the new backyard aka our outdoor living space that ends at the water's edge and has a park-like setting but we knew we would have to make some modifications. While during the week it is my husband and I at home the kids are home so there are usually nine of us but with the soon to be new additions that number will be thirteen. We do a lot of entertaining that includes extended family members and friends so we often have thirty or more for weekend outdoor events. Since the water plays a large role too, it was important to use to create a comfortable and useable outdoor living space.

Before

Unfortunately the backyard was quite overgrown. The previous owner just kept planting and planting. She was in fact planting the day of the move! The problem was she planted shade loving plants in the sun and visa versa. I'm still finding rogue plantings and garden decorations. A true dilemna is trying to work in both herbal and vegetable gardens. We know the vegetable garden cannot go in the backyard but I'm sure working herbals into the perimeter will work.

The larger picture shows part of the backyard and deck after we removed a large forsythia bush that prevented entry onto the dock (1) and raised the tree bonnets so we could see the water. Removing the forsythia was bitter sweet. We needed access to the dock but the bush was blocking access yet it was a beautiful bush. Removing the bush made the dock useable but we needed to repair the area in front of the dock. We had thought of patio stones but then decided that sod would be best. Under all the trees there were small, overgrown gardens (2) with five cedar bushes surrounding one (3) silver maple. The cedar bushes were mosquito and spider magnets. Now this isn't good because of the West Niles threat and it would appear I'm allergic to at least some kind of spider bite so spider control (more on that later) is now a real concern. These are not really nice looking spiders either but more on that later once I get them identified. It also wouldn't sit well for outdoor entertaining. An old and neglected pathway of stepping stones (4) led to the dock but we decided they had to go as well. I don't think the pathway was all that unsightly but my husband didn't like it so it went anyway. In fairness it was in an awarkward location and we really need the green space so he is quite correct.

Prep work including removing all of the overgrown gardens, cedar bushes (3) and stepping stones. That was a lot of work! Not shown in the picture is a circle about 6' diameter at the start of the stepping stones that originally was paved with a fountain the original owner somehow forgot to leave behind. I was actually happy she didn't leave it since the fountain was right in the path between the kitchen and dock. Removal of the vegetation took a few days and a few trips to a relative's burn pile. It was a lot of work! The cement was recycled for errosion control by a friend. The cleaned areas were raked well and topped with top soil just before laying the sod. Once everything was cleared out and prepped we had a glimpse of what our new outdoor living space would look like.

The sod came in rolls on a flatbed trailer and yes it is heavy (5). This is a DIY project but it is hot, heavy and dirty work. Because of the time factor getting the house ready for the anniversary party, we hired it out. They were able to do everything the same day even though we were cutting the timing close. The weather was working against us, very hot, humid and unseasonably dry. Once part of the sod was laid where the cedar bushes had been (6) we knew we had made the right decision. New picnic tables (7) were constructed for the event. We wanted to keep that pleasing park-like setting. In all the installation took about 5 hours.

The sod was looking rather sad during the installation process (1). The temperatures were blistering hot and the summer had been unseasonably dry that I think the only thing that saved the existing grass was the copious amounts of shade. I took a picture from the upper sunporch of our newly gained yard space that hopefully would be ready in time for our anniversary party.

The sod went in on the Thursday before the anniversary party so we kept the water going until late Sunday afternoon. It would have been nice to set up a water system from the water's edge but our neighbour had been having a lot of problems due to the lower water levels so we decided to use municiple water. The sod was practically swimming! We let the ground firm from then until the party. While it did not look like a pristine, well manicured lawn it was considerably better than it had been and held up well with the extra traffic of almost seventy people. The following day we watered in the morning only then continued doing that for the following five days.

Now

This is not the best picture as it was taken from the upper level sunporch through the screen but we are really pleased with the results. The numbers show all the areas where we sodded. As you can see the space is now expanded to fit our needs. The sod is doing nicely and thanks to Mother Nature we haven't had to water as much. A water system for using the natural water is in the works so watch for that. Oh and just up from 5 we removed an entire small garden something I forgot about when preparing the picture.

It is always very important to us to create an appealing outdoor livingspace for our family and friends wherever we live. We are very pleased with the results so far. In the spring we will be working in more vegetation, mainly herbs around the perimeter but keeping the centre portion open and user friendly. An overgrown sloping garden with English Ivy ground cover will more than likely be replaced with an herbal garden since it is close to the kitchen. We've decided to keep what vegetables we are growing out of the backyard ares and while that is proving to be a bit more challenging it fits in our scheme of creating a warm, welcoming and functional area to entertain larger groups of of family and friends.

Happy Gardening!

Garden Gnome
©2007


Wednesday, August 15, 2007

A Walk-a-bout the Gardens

Each time I do a walk-a-bout the gardens I discover new plants. I'm excited even though I am sorely missing my main vegetable garden this year. Plans are underway for a late season garden as soon as it cools a bit more at night. I'm hoping to plant towards the third week of August for our zone. In the meantime I've been starting herbs and discovering what is already growing here.

Daylily

Daylilies (Hemerocallis sp.) are hardy, adapatable and rarely bothered by pests. Their showy, trumpet shaped flowers are sure to please. As perennials they are very easy to care for. The only place they do not grow well is near trees. They like full sun, regular water and occasional fertilizing. Deadheading will keep the plants tidy and may encourage some daylilies to rebloom but it not really necessary. Daylilies are propagated by root division every 3 to 5 years.

There are several clumps of daylilies here that won't be able to be identified until they bloom. I suspect at least one will be the common Tiger lily. I have not identified this daylily that is quite similar to Dark Star that is growing in the outer most yard. This daylily is undeniably orange instead of the deep rose of Dark Star. So I will have to do a little research.

Morning Glory

Morning Glories (Convolvulaceae sp.) are my favourite flowering vines so I was delighted to discover a couple of very small vines in the front garden. Spiral shaped buds open to funnel shaped flowers. New flowers bloom daily opening in the morning and dying off by late afternoon. Morning glories can be trellised and used as privacy screens. They will not attach to siding or brick making them ideal flowering vines for the side of houses. Most morning glories in our zone are annuals but these appear to be perennial.

Bird's Nest

There is always something special about discovering a bird's nest. This is the second one I've found since moving here. It is in the branches of a small ornamental tree near the front door. The nest is high enough that I can't see into it but there doesn't appear to be any activity.

We have a nice variety of birds in the gardens. A pair of cardinals visit daily as do several sparrows and house finches. Other identified birds that visit include: Baltimore Oriole, Cowbirds, robins, bluejays, grackles, redwing blackbird, goldfinches, swallows and Northern flickers. There is also a wide variety of water fowl. I haven't seen a hummingbird visiting yet but know they are in the area as are woodpeckers, nuthatches and many more. It will be interesting documenting the various bird species visiting our new gardens.

Happy Gardening!

Garden Gnome
©2007


Wednesday, August 01, 2007

In the Garden

Not much has been happening in the gardens other than clearing brush and over growth. We decided to remove all of the remaining bits of garden decorations left by the previous owner to create a more uniform theme. The focus has been on preparing the greenspace areas for our upcoming anniversary party. The unseasonably dry weather combined with higher temperatures are working against us. I've put the sprinkle to both the grass and shrubs hoping it will help. The sod is scheduled to be put in tomorrow where we removed gardens entirely. I will have to keep the water to these areas so the sod survives.

Gnameless Gnome

Gnameless has taken up watching over the gardens between the house and garage. He's the official gnome greeter for newly arriving gnomes. He is shaded by a large peony (Paeonia) and boxwood. I'm not sure what colour the peony is so will have to wait for the blooms. I've always wanted peonies as my Mom had them in her garden. There are three peony bushes in the garden area between the house and garage. I'll comment more on growing peonies in a later blog entry.

Racoons

The previous owner left a stump that I felt would work well with my theme. I nestled the stump into a cascading bed of English Ivy off the covered patio. The ivy covers the hill at the side of the house opening into a wider, ivy covered garden filled with various plants, some of which need to be removed. Our long-time garden helpers, the racoon brothers, found a home on top of the stump. They will be guarding a gnome entrance, not yet installed. To the right of the stump are more boxwoods. Behind the stump is a clump of silver grass.

Rose of Sharon, Althea

Rose of Sharon (Hibiscus syriacus) is a beautiful flower bush that I previously commented on here. They are often used as hedges in our area or as an ornament bush in the garden. I had three varieties in our previous garden and saved seeds from each. With any luck I will be able to enjoy these varieties again in this garden.

I was quite pleased to discover a lovely Rose of Sharon (Althea) in the gardens between the house and garage. Unlike my the Rose of Sharon from the previous garden, this one has double blooms giving the bush a rather exotic look. The bright pink blooms add a wonderful splash of colour against the green backdrop and English Ivy ground cover.

Happy Gardening!

Garden Gnome
©2007


Sunday, July 29, 2007

Clematis


Clematis
(Clematis viticella)

In a previous post I spoke of Clematis, a beautiful flowering vine. This is one vine my husband will let climb on the side of the house. It does not damage the siding or motar like English Ivy or Trumpet vine. Clematis does need to be supported usually by some type of trellising system. I had two clematis growing at our old house. One was transplanted from the house before and one was planted from a nursery potting. Neither did well until this past year so I was saddened to leave them behind. I took a few clippings without much luck so was quite pleased to find a blooming clematis between the archways of our covered patio.

Clematis comes in a wide range of colours and flower shapes and sizes. My experience is this vine takes a year or two to start growing nicely after transplanting. It likes cold feet and a warm body meaning that the roots should be shaded while the vining growth does well in the sun. They are tolerant to pruning but improper pruning will result in fewer blooms. My clematis has never really needed pruning but I suspect this more mature vine will need it. More about pruning can be found here.

Clematis can experience clematis wilt usually due to damaging the younger stems. A fungus, (Ascochyta clematidina, most common) can attack the damaged area causing wilting. The best remedy for this is to prune out the damaged area to 1-inch below the infected area. Mildew can also affect Clematis later in the season. This is more problematic for plants in areas without good air circulation.

The most common pests of clematis are earwigs ( Forficula auricularia) and slugs. Slugs attack the early shoots while earwigs attack the later blooms. Both should be controlled to prevent damage and in the case of earwigs an indoor infestation. This can be quite a problem when clematis is growing along the outside wall of a house and there are ground level windows as in our house. Slugs can be controlled using commercial slug bait (not my choice), homemade slug traps or manual removal. Earwigs while they damage the flowers are even more of a problem indoors where they will settle into anything damp. They do cause damage to the blooms they are a nuisance indoors. Control using a manual removal method is best. Roll up a wet newspaper and leave overnight as a trap. In the morning carefully pick up the newspaper and shake the earwigs into a bucket of soapy water. This method works well indoors or outdoors.

Happy Gardening!

Garden Gnome
©2007


Saturday, July 28, 2007

English Boxwoods


English Boxwoods
(Buxus sempervirens)

English Boxwoods (Buxus sempervirens) are broad leaf evergreens. These are wonderful, easy to maintain shrubs that add a sense of formality to gardens. They line our laneway creating a welcoming entrance. These shrubs have densely packed light green leaves with a rounded, compact growth habit. They reach about 3 feet high at maturity.

We have a lot of boxwoods. Boxwoods prefer well drained soil to prevent root rot. While they will grow in full sun they prefer partial shade. Pruning is necessary to keep the proper rounded shape and formality. Pruning should be done at least once a year. Mulching is necessary because of their shallow root system. Mulching should be about 3 inches thick starting at the trunk then working outwards for about one foot. During the winter boxwoods may experience bronzing because of exposure to wind and sun. The leaves will turn from green to a reddish brown. To prevent this, spray the shrubs with an anti-desiccant in late November and again in late January. This will help stop water loss from the leaves. Any damaged (winter bronzing) foliage should be pruned out in the spring. Keep the shrubs well watered during the growing season.

Happy Gardening!

Garden Gnome
©2007


Wednesday, July 18, 2007

Gnomes & Garden Lighting

The majority of the work in our new gardens has been the removal of an over planting of shrubs and other plants. Most of these have been under large shade trees. Some like an overgrowth of low growing evergreens were removed not only to enlarge the usable greenspace but for mosquito control. Others like English Ivy and Trumpet Vine growing on the brick of the house were trimmed back and removed from the brick to prevent damage. The only additions to the gardens so far has been lighting. The original and still existing lighting includes a large mercury post light over the driveway, a three lamp post light near the start of the backyard, spotlights on the garage and sunporch overlooking the backyard, covered patio lighting and enclosed entrance lights at the entrances. While all these serve a purpose and will be used from time to time we find that type of lighting too harsh and high energy consumers. The ideal solution I decided would be solar lighting.

Gnorbet and Gnorman are the first gnomes to the gardens. Each stands under a larger solar bright white lamp on each side of the dock entrance. They are the welcoming gnomes for other gnomes arriving by boat while guarding against trolls who may try to do the same thing. Their cheery smiles welcome human visitors to enjoy the beauty of the water and gorgeous sunsets.

The gnomes are very much concerned with energy conservation. They love the new solar lighting highlighting the garden. It is a softer glow without the harshness and glare of the existing garden lighting. They can now go about their garden work during the night without being disturbed by bright lighting.

Solar Lighting

Solar lighting was the perfect solution for the looking I want for all the garden areas. Ontario has followed in the steps of Australia and ban incandescent light bulbs by 2012. Most of the existing outdoor lighting here is some type of incandescent light bulb. We will be replacing these bulbs as possible with CFL bulbs which means new fixtures in a few locations. I calculated the cost of each 15 W CFL bulb to be $1.32 at 8 hours per day for the entire year. In comparison, a 60 W incandescent bulb would cost $5.26 per year under similar conditions. Multiplying these figures by the number of bulbs in use shows that using CFLs make good economic sense. However, my viewpoint is that using no electricity where possible makes better sense.

I chose Home Brite Solar Super Bright White LED solar lights. These come in a 4 or 12 light pack with the 12 pack being slightly cheaper. Each pack was $39.99 with an additional $5 instant rebate when purchased before June 17, 2007. I bought three packs of 12 before the move to take advantage of the rebates for a total cost of $104.97 along with two gnome standards ($29.95), three copper solar lights ($14.98), a hummingbird solar hanging lantern ($9.99), 2 solar rocks ($9.98) and a dancing 5 flower solar light ($9.99) for a total cost of $179.86. Now this sounds expensive but consider that using the existing outdoor lighting would cost $47.40 per year the payback taking only operational costs would be 3.79 years. However, if you factor in the solar lights can be installed without further costs in areas that would be harder to access by conventional means, they will be on for longer periods than the eight hours as the days get longer and there are no bulbs to change, the payback period is likely closer to 2.5 years. Calculating the lifespan of each solar light at 100,000 hours and on for 8 hours per day works out to 34.25 years so overall, solar simply makes good sense.

The solar lights are very easy to install in any location where the solar panel receives eight hours of direct light daily. At first I thought this would be difficult in some areas but by watching the pattern of the sun through the day, I found meeting this criteria to not be a problem. The first area I chose to install the solar lights was the area between the house and garage. A large garden curves from the garage (right), in front of the porch (not shown), ending at the sidewalk leading to the backyard. Lighting the garden in this area would have involved installing fixtures and running wiring. I started at one end of the garden with a solar light then paced it of with about four of my foot steps and placed another continuing in this manner until the entire garden area including in front of the porch was laid out. Then I went back, tapped each spike into the ground, set the solar light and stake onto the spike, then removed the protective covering from the solar panel. The entire garden area took me about 20 minutes! I wanted a subtle glow on the front of the house so placed the solar rocks on each side of the front of the porch aimed on an angle towards the door. The overall effect is a nice, welcoming glow when entering from the laneway. More solar lights highlight a small garden in front of the kitchen window (lower level) near the stairs leading to the sunporch (upper level) and the patio (lower level).

The next area to be lit using the same method was along the cedar hedges hiding the breakwall on each side of the dock. Gnorbet and Gnoman provide lighting entering the dock while the dancing flowers sit on a table on the dock providing a bit of whimsy. The humming bird feeder has more of a yellow glow when lit. It found a spot near the bird feeders. The copper solar lights are still waiting for a home.

Other solar lighting projects I'm considering include: A solar operated, two spotlight, motion activated security light would be ideal and eliminate the need for conventional lighting in the garage/laneway area. This type of fixture would also be good for the stair area leading to the backyard. A solar powered multi light, one panel system would be great for the dock if we decide to light that area more. Some type of solar lighting would be nice for the garden area between the garage and road as well. A similar multi light, one panel system would also work for the upper level sunporch since the roof gets good sunlight exposure. All things considering, I will be looking for solar ideas as much as possible throughout the gardens.

Happy Gardening!

Garden Gnome
©2007


Wednesday, July 11, 2007

Purple Martin House


Purple Martin House

The Purple Martin (Progne subis) is a member of the swallow family. It is a medium sized, migratory song bird much desired in gardens. The male is entirely a glossy dark, purplish black sheen while the female is purplish black with a duller sheen and lighter underpants. Several Purple Martins will nest in a multi-compartmented birdhouse much like a bird condo building. They return to nest in the same area each year. Purple Martins get both their food (insects) and water while in flight. While they do eat a wide variety of winged insects they fly relatively high enough that mosquitoes do not form a large part of their diet.

In our area, Purple Martin houses and dried gourds, painted and turned into birdhouses to attract these birds are a common sight. The houses are normally painted white with blue or green roofs while the gourds are painted white and hung in groups. Both need to be monitored to prevent the invasive species House Sparrows (Passer dometicus) or Common Starlings (Sturnus vulgaris) from taking over the house. These birds need to be actively removed from the house or the Purple Martins will abandon it.

I was quite excited to find a Purple Martin house in our garden. It sits on the north side of the back shaded by a lovely silver maple tree (Acer saccharinum). It is in need of repair and monitoring. A family of house sparrows has taken up residence in the centre compartment. Once the nest is empty we will clean out the house in the hopes of attracting Purple Martins to nest there.

Happy Gardening!

Garden Gnome
©2007


Thursday, July 05, 2007

Last Thursday was moving day. It was an extremely long and tiring day yet I was up at the crack of dawn to explore our new surroundings. I did a walk about the gardens with the camera noting some of the plants that I haven't grown before or have very little experience with.

Greenspace

Our property is on a deadend road. A greenspace dotted with a stand of trees separates our road from the main road. The greenspace buffers any noise from passing traffic while creating a wonderful scenic view when leaving the house.

I took this photo just as the sun was rising on June 29. Sunrise is one of my favourite times of the day. The air was cool with little humidity promising a beautiful day.

Laneway

After walking back up the laneway I turned to take this photo. It was the first photo of our new house to appear on my other blogs. I think it is majestic and peaceful. The boxwood (Buxus) lined laneway beckons exploration. Not shown in the photo is the garage. The laneway ends with an asphalt to the front of the garage for extra parking and a pad at the side of the garage for driving into the garage. I have no experience with boxwoods so will be learning a lot about them in the very near future. Watch for a post focusing on boxwoods soon.

A large weeping willow (Salix babylonica) with a trunk diameter of about four feet or more graces the garden area between the garage and road. I have never had a weeping willow of my own but I grew up with weeping willows. We used to swing on the branches Tarzan style over the river until my mom caught us. These beautiful trees are quite popular along water banks. Years ago we rented a house with a weeping willow so we know from experience that these can be dirty trees for vehicles. Prior to this house, the last experience with a weeping willow was from my neighbour's property. Spring storms clear out a lot of the dead branches and some new ones as well. The only real maintenance for these trees is removal of dead branches and pruning underneath if they overhang laneways as ours does. Saturday we pruned the bottom to allow the vehicles to pass underneath.

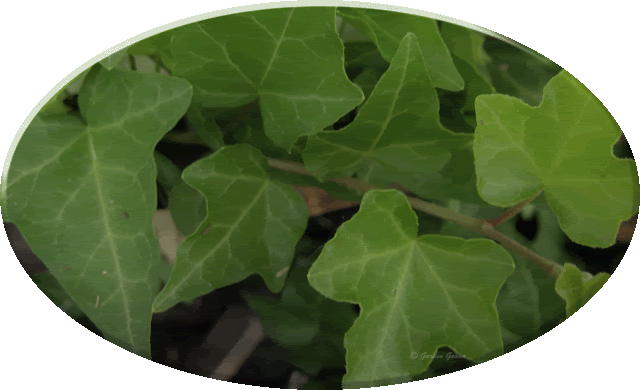
On my walk about I noticed the following plants that I have no experience with: buttercup, hostas, miniature rose bushes, coral bells and silver grass. There are a few so far unidentified plants as well. There is a lot of English Ivy being used as ground cover. If you read the previous entry on English Ivy, I can attest it does provide a good habitat for rodents. Other potential pests I noticed were: grackles, squirrels, earwigs, and carpenter ants. Measures are already underway for rodent and ant control.

Stay tuned to see more pictures and read about my new gardening adventures.

Happy Gardening!

Garden Gnome
©2007


Sunday, July 01, 2007


Happy Canada Day


Happy Gardening!

Garden Gnome
©2007


Tuesday, June 26, 2007

A Final Goodbye to this Garden

My garden here as I knew is is no more and may cease to exist entirely after the new owners take possession of the house. This garden gave me much more than I could even begin to put into words. It was such a learning experience in all aspects. I have so many memories and pictures of this garden so it will live on in my mind, in our family discussion and in the scrapbooks. It will also live on through the occasional post on this blog when I'm not talking about my new gardens. So I bid this garden a fond farewell. I hope it lives on to bring happiness and joy to the new owners and if it doesn't it can rest easy knowing how much it brought to us. Oh and I should mention the gnomes, fairies and other mystical inhabitants in this garden have decided to move with us so all is well.

Thursday we move to our new house so this will likely be the last post until after we are moved. Sometime between 4 and 8 am Thursday morning the phone service will be turned off here. Sometime between 9 am and 5 pm we on Friday the phone service will be activated at our new home. I should be back online Friday night if all goes well. Until then,

Happy Gardening!

Garden Gnome
©2007


Sunday, June 24, 2007

Bee Balm


Bee Balm
(Monarda didyma)

Bee Balm (Monarda didyma ) is a hardy perennial herb that is unsurpassed for attracting hummingbirds, butterflies and bees to the garden. It is a member of the mint family. I will be taking a portion of the clump to the new house. M. didyma is a hybrid so is best grown from clump division rather than seeds collected from the plant as plants grown from the seeds will not breed true. I collected seeds anyway just to see what comes up.

Bee Balm grows as tall as four feet high in most soil types including heavy clay. Like most herbs, bee balm prefers a drier soil. It requires part shade to a sunny location. The plant blooms in July and August with flowers that are bright red (M. didyma), white (Wild Bergamot aka Oswego Tea ), purple (M. media, M. citiodora, M. pectinata) or pink colours (M. fistulosa aka Wild Bergamot). It transplants well and the clump should be divided every other year to keep the plant healthy. Bee Balm is an aggressive spreader that is mainly problem free other than powdery mildew and rust. These problems can be controlled using a natural fungicide like chamomile tea sprayed on the leaves and water at the soil level to keep the leaves dry.

Bee Balm is a great herb for the garden as well. It attracts beneficial pollinators like bees and butterflies. It is a good companion plant to prevent attack of subterranian pests for vegetables The oil in the roots of Bee Balm act as a deterrent. The bright red flowers are sure to bring a smile while providing a nice backdrop for other plants.

Bee Balm can be dried then used as a tea, as an aromatic herb for sachets and potpourri or as cut flowers. It is well suited for use in wildflower gardens as well. The original American colonists drank Bee Balm tea to protest the tea taxes. The tea has a strongly minted flavour. To use bee balm as a medicinal tea for headaches and fever as it contains an active diaphoretic (sweat inducer), pour one cup of boiling water over 1 tsp of dried bee balm and allow to steep 10 minutes. Drink at bedtime for insomnia. Bee balm can also be used as a pleasant, minty iced tea in the summer.

Happy Gardening!

Garden Gnome
©2007


Wednesday, June 20, 2007

Lily of the Valley


Lily of the Valley
(Convallaria majalis)

Lily of the Valley (Convallaria majalis) is one of my favourite garden flowers. It evokes pleasant childhood memories and has been in every garden I've created since we were wed. I can remember laying on the cool grass gazing into the glass rocks my mom had surrounded by the heavenly smell of Lily of the Valley. I have a nice sized patch of Lily of the Valley on the north side of this house. While there is a very good chance that Lily of the Valley is already planted at the new house, I will be taking a few plants just in case.

Lily of the Valley is a very popular, hardy ground cover perennial for shady areas in our zone normally planted on the north side of the house but quite often found planted under trees as well. This plant is a slow spreading by rhizomes with fragrant white flowers that bloom in the spring followed by glossy red berries. It is rather problem free but can get leaf and stem rot during the rainy season. Lily of the Valley is a medicinal herb used as a cardiac tonic and antidiuretic similar to Digitalis. Pips, flowers and berries are poisonous so be sure to supervise children if you have Lily of the Valley growing in your garden.

Happy Gardening!

Garden Gnome
©2007


Tuesday, June 19, 2007

English Ivy


English Ivy
(Hedera helix)

I have a somewhat small patch of English Ivy (Hedera helix) growing along the south side of the house originally planted to hide a gas line. I'm taking several clippings of this plant to our new house. This versatile evergreen ivy can be grown as a houseplant or outdoors. When grown outdoors, English Ivy can be used as a maintenance free ground cover, climbing vine or in a hanging basket. It can climb as high as fifty feet, attaching itself to wood and brick via aerial rootlets. English Ivy provides summer shading when grown as a climber on the south side of the house and when grown on lattice can create privacy screening. The climbing nature of English Ivy makes this an ideal plant for hiding unattractive but necessary pipes on the outside of houses. It can mask an ugly wall with its beautiful greenery. This ivy grows well in shady making it ideal for problem areas like under trees. The vigorous and dense growth pattern of English Ivy also make this plant ideal for weed and erosion control. The plant also does well in sunny locations. With all the benefits English Ivy offers, what are the negatives and why do some people want to rid their properties of this plant?

What some people consider beneficial plants others view them as weeds. So it is with English Ivy. This plant is listed by Oregon and Washington (cultivars: Baltica', 'Pittsburgh', 'Star') as a noxious weed. It is considered aggressive, invasive and introduced species to North America. Concerns regarding this ivy as indicated by No Ivy League are that this plant results in monocultures that provide no habitats for indigenous wildlife. However, I do not agree with this opinion. When grown as a ground cover, English Ivy provides cover and habitats for small rodents, toads, frogs and snakes. More than one a toad or snake has scurried out of my little patch. When grown as a climber, English Ivy provides a safe haven for smaller birds. If you watch a patch of this ivy grown up the side of a house, it isn't long before smaller birds like the House Finch (Carpodacus mexicanus) are seen flitting in and out of the ivy. This bird originated in the southern US and Mexico making it indigenous to North America. It has since spreed throughout the United States and southern parts of Canada. Their nests are about three and a half inches in diameter easily making English Ivy an ideal spot for nesting. The berries provide food for birds as well. English Ivy also provides a habitat for insects including beneficial insects for the garden.

Since English Ivy can become a habitat for rodents, insects and snakes some precaution should be taken when using this plant as a climber on the outside of a house. While it does look very pretty covering a wall and softening the window edges, it's best to be sure you have good screening to prevent insects from getting indoors. You may also have to spray for spider and mosquito control something that when growing organically as I do is avoided unless absolutely necessary and then on non-edible plants only. To prevent problems with rodents keep the ivy trimmed at the bottom, effectively removing the rodent habitat. One further problem with English Ivy grown on a house is the aerial roots attach to the wood siding or brick. Removal of the vine leaves marks on either. It can present problems on brick walls with loose mortar can be seriously damaged by English Ivy as well.

English Ivy despite it's problem can be a beneficial plant. The invasive nature of English Ivy can be kept in check by pruning. The berries are poisonous for humans so be sure to keep an eye on children around this plant. It should not be planted in areas where the invasiveness could cause problems or climbing nature can cause problems. English Ivy should be pruned to prevent leaf spot. Mites can be controlled using insecticidal soap. Other than these problems, English Ivy is rather problem free.

English Ivy is easily propagated by cuttings. Simply cut an end piece about four or five inches long then place the cut end in water. New roots will appear in a few days ready for planting either indoors or outdoors. A mature English Ivy plant produces berries that birds eat thus spreading the seeds for new plants or you could plant the seeds yourself.

I will be planting my English Ivy both inside and outside. The new house is bricked so I doubt my husband will want it planted as a climber even though it would give the front of the house (facing away from the water) a cute, English cottage appearance. I plan to use it outdoors in hanging baskets and possibly as ground cover depending on what I find in the gardens when we get moved in. For now the English Ivy cuttings are happily forming roots in a container of water.

Happy Gardening!

Garden Gnome
©2007


Friday, June 15, 2007

Trumpet Vine


Trumpet Vine
(Campsis radicans)

Years ago when we bought our second house there was a vine growing up the south side of the house. This was an old, turn of the century, wood sided, two storey house in need of tender loving care. We were young and naive so tackled the job that ended up being an almost 12 year project. We did everything from designing a huge kitchen, re-roofing, siding, new wiring, new plumping, refinishing wood, installing a pool with large two level deck and privacy fencing. Finally we tired of our money pit and sold it for a non-descript subdivision house with no character but minimal work. We are now moving into house number five and a bit wiser but back to the vine.

I thought the vine was beautiful. It was a bright green and shaded a good portion of the southside wall in the summer. It never flowered in that location as my husband ripped it out because it was damaging the wood siding. We found remnants of the vine under the second story siding coming through the wall when we did the wiring! I salvaged a few pieces, set them in water to root then planted them along what was then a chain link fence. By the time we put in the privacy fencing the vine had grown considerably so I decided to leave it to soften the look of the fence despite my husband's protests. I was rewarded with beautiful deep orange trumpet shaped flowers. A few years later when we sold, the vine had covered a good portion of the fence and was pushing some of the fence boards loose. My husband declared it a weed worthy only of Round-up but it was too late, I had already fallen in love with this beautiful vine.

After we moved, I was at the nursery looking for plants when I discovered the same vine except it had yellow flowers. It was a trumpet vine (Campsis radicans) so I bought it much to my husband's dismay. I had strict orders not to plant it anywhere near the house! I brought a piece with me when we moved here and planted it by the old garage now being used as a garden shed. The vine is growing nicely but hasn't flowered yet. I'm taking a few cuttings with me to the new house.

The trumpet vine is a low maintenance, fast growing and spreading vine that is ideal for privacy screening. It is pest free and fairly drought tolerant. In fact, this is one vine that lives on neglect. It transplants easily and new vines can be grown from cuttings. The beautiful trumpet shaped flowers attract hummingbirds, wasps and bees all of which are beneficial pollinators in the garden. Unfortunately, the trumpet vine can be invasive and should not be planted against houses or other buildings. It is best if contained somewhat to prevent the invasiveness. So becareful where you plant this vine. The trumpet vine can cause rashes for some people so gloves should be worn when handling the vine. Propagation can be through cuttings or air layering.

Happy Gardening!

Garden Gnome
©2007


Thursday, June 14, 2007

Snow-in-Summer


Snow-in-Summer
(Cerastium tomentosum)


My mother-in-law introduced me to Snow-in-Summer when we bought our first house over twenty years ago. Since then I've grown this low growing ground cover with dusty green foliage and pretty white flowers at every house we've owned. This move will be no different.

Snow-in-Summer is a very easy to grow, low maintenance perennial. It is undemanding and will grow in most soil and light conditions. This plant is invasive so needs to be contained by borders if you want to use it as a border. Otherwise, let it spread. Snow-in-Summer blooms late spring to early summer. I propagate by dividing the rootball then planting the second clump where I want or in a pot for moving. I keep the soil moist but not wet until the new clump has rooted and shows signs of new growth then water as normal.

I've only encountered minimal problems with Snow-in-Summer. Unless the clump is dense, weeds like quack grass can root within the Snow-in-Summer. The easiest way to deal with this is manual removal until the clump gets dense enough to strangle out weeds. If the Snow-in-Summer is planted where leaves will fall on it during the autumn, remove the leaves. If you don't, the leaves will cause the plant to die off. The biggest problem I had with this plant at one house was our cat who decided the Snow-in-Summer made a nice bed for him. Now this cat was a heck of a lot more determined to get his way so finally I gave up. Aside of the perpetual indent made by the cat, the Snow-in-Summer thrived and spread. This is one plant I'm looking forward to growing in my new gardens.

Happy Gardening!

Garden Gnome
©2007


Monday, June 11, 2007

My Garden - What I Will Miss


Sunrise on Greenhouse
May 30, 2007


One of my readers asked what I would miss about this house when we moved. Aside of the fact that I love the charm of the inside of the house of which I will think of fondly, I won't miss the lack of privacy the property has. What I will miss the most is my garden. The way the greenhouse glows in the early morning as the sun rises always brings a smile. I love being in the garden at day break. It's a magical time of the day!

My Vegetable Garden

This is a scan of my vegetable garden from a portion of an arial photo taken last September of our property. An arial photography firm photographed all of the properties in our area because of the water location. They gave each home owner a change to buy the framed photos for $200. I bought it because it showed our entire property including the waterfront and dock. The photo is a wonderful addition to my genealogy files!

I will miss seeing what we accomplished in this garden. Our property is in two portions with a road going between the main portion and the waterfront portion. When we moved here four years ago, the garden was an over grown patch of weeds approximately 8' x 10'. The location quickly made me realize that it wasn't the best spot for a garden. Two huge trees are on the eastern property line, one on the north corner and one on the south. Another huge tree (about 4' diameter trunk) is about half way up the main portion of the property but on the neighbour's property. The three trees provide ample shade. Despite this, I decided to keep the garden in the same location but use raised beds. After doing the research I made the paths 3' wide and added a greenhouse. The original garden consisted of five raised beds. We added three smaller raised beds last year. From the start the garden got a lot of interest from passerbys and word spred through the village so some made a special trip to see the garden and ask questions. I was the first to use the square foot garden method in the area. Now because of my garden success using the square foot garden method there are at least three others here using the method.

As the days grow closer to the move, I'm saddened by what I'm leaving behind. Part of this garden will live on in the next gardens as well with the few clippings and transplants I'm taking. I'd love to say that the garden will continue but it is doubtful given the person who bought it (arrogant, obnoxious and looking to flip for a quick buck). I do hope it will continue to exist and evolve. I'd like it to be loved and nurtured as it was meant to be. Still with my many photos it will exist in my mind and memories.

I'm excited at being able to create a new vegetable garden that will accent the mature landscapting at our new home. I already have several ideas so have been making sketches and plans for the new vegetable garden. I'm excited at the prospect of learning about some of the new to me plants that the previous owner planted. I spoke with her briefly the day we finalized the sale on that end. Her eyes misted over as she talked about her gardens and how she was so happy that they would be in the hands of someone who loves to garden. I'm glad I was able to make her happy. I hope she stops in from time to time to visit in the garden. The gardens there are absolutely beautiful!

Happy Gardening!

Garden Gnome
©2007


Tuesday, June 05, 2007

Strawberries and Moving Plants


Strawberries
June 2, 2007

My strawberries have just started producing. These were the first of the season so I had to share them. The technique used on the photo is called selective colouring, combining black and white with colour done in Photoshop. I will be taking a few of these June bearing strawberry plants to the new house. Unfortunately I do not know the variety but they are very proliferic with large, juicy, sweet berries. I plan to plant some everbearing strawberries at the new house as well. Having had no experience with everbearing varieties I will have to do a little research to see what varieties are best for our plant hardiness zone.

By far the easiest way to bring along plants when you move is to bring established plants. However this can present a few problems. Potted plants take up a lot of room something that can be a major consideration depending on the type of move you are making. Even short distance moves can be problematic when dealing with live plants. A few years ago when we moved into our third house, we rented a large moving truck and had it ready for moving by lunchtime figuring we would get the keys by then. All my houseplants were loaded last so they could be unloaded first and since it was a short distance move I was not anticipating any problems. Unfortunately there was a glitch with the people that had bought our house to the point of the very real possibility of not being able to settle it before the close of business and it was a Friday with all our stuff packed. In the resulting chaos and stiffling heat, no one thought to check on the truck. I lost all but two of my houseplants and all my candles. We learned a valuable lesson that day!

The second problem with transporting live plants especially for the garden is you run the risk of bringing damaging insects and disease that will contaminate your new garden. The best way to avoid this is to take your clipping or transplants well before the move then isolate them well away from other plants. Cover them with garden cloth to prevent insect infestations. Check them daily and treat with a soap solution if necessary.

While I will be taking a very few transplants and clippings, the method I'm favouring for this particular move is seeds collected from last year's plants. Not only will this save a lot of space during the move, it will lessen the problems of moving live plants during the summer when temperatures can soar. The primary reason I decided to limit the number of live plants for the move is that the gardens at the new house are mature landscaping and in some areas overplanted. I have no idea what is planted where aside of the trees and bushed. The current ower was still planting more the day we finalized that sale!
Happy Gardening!

Garden Gnome
©2007


Friday, June 01, 2007

Lemon Balm

Update: We have sold our house and will be moving in 27 days so my gardens aside of maintenance are on hold. I am taking plants I started here from plants I know I will want at the new house especially herbs and strawberries. There should be time for a late garden after we move. The gardens there are mainly floral, trees and shrubs in a mature landscape. Some of that will need to be cleaned out. One portion is lovingly referred to as the Garden of Eden by the seller so I can't wait to see everything she has planted in there. The next few posts will highlight some of the plants I'm taking with me.


Lemon Balm (Melissa officinalis)
May 31, 2007

Lemon balm is one herb that I will be taking with me. This wonderful herb is a lemon scented member of the mint family. Be warned before planting it, that as with other mints, lemon balm is invasive so should be contained unless you want it everywhere. It would make a lovely ground cover for problem areas, rewarding you with a pleasant lemony aroma when trimmed back. Despite the invasiveness of lemon balm, this is one beneficial herb that can be used for culinary uses or medicinally.

Lemon balm almost thrives on neglect. It spreads and spreads and spreads. I'm rather brutal in trimming back this herb. The sprigs don't go to waste though. I use them either dried or fresh. Sprigs of lemon balm are nice in iced teas or as garnishes for salads. Fresh sprigs can be chopped and stirred into fresh (unsalted) butter with a little lemon zest. Use this to baste fish especially salmon when grilling for a delectable delight. Lemon balm tea can be made from either fresh or dried leaves. The tea has mild sedative properties and can be used to relieve gas much like other mints. It can help reduce a fever but can increase perspiration.

Happy Gardening!

Garden Gnome
©2007


Thursday, May 24, 2007

Slugging the Slugs!

Pokey asked about slug problems in strawberries. I thought the topic should be discussed in greater detail. As many of you know, I garden as organically as possible with dish soap and vinegar being about as toxic as I will use. I also grow most of my vegetables in raised beds or containers. This makes slug control considerably easier. Most slug control involves killing them off. As always my caveat is to identify the pest first before taking any action. The easiest way to detect slug activity is of course seeing them in action. If you haven't actually seen them, then place a brick or folded sheets of wet newspaper near the damaged plant in the evening. The next morning check for slugs. If there are slugs, manually remove them and depending on the extent of the problem take stronger measures.

Slugs must be able to get into the raised bed or container. A simple way to prevent this is to place copper tape or wire or tubing around the perimeter of the raised bed or container. It can be a decorative element just make sure it goes around the entire perimeter. Fasten it down securely. The slug slime interacts with the copper essentially electrocuting the slug. If your plants are in traditional beds, place the copper wire or even copper pennies around the base of the plant to protect them.

Beer has long been a remedy for slugs but use cheap, fresh beer instead of stale beer. This method will confirm the damage is actually being done by slugs as well. At dusk, pour about 2" of beer into a sour cream or margarine container. I like the smaller cream cheese containers for this purpose. Bury the container to the rim near the damaged plants. The next morning remove the drunken slugs and dump the debris nearby. This will attract natural slug predators effectively giving two lines of defence against the slimy little critters.

Caffeine is an effective slug control. Pour left-over coffee into a spray bottle then spray directly onto slugs in the evening. Place used coffee grinds around the slug damaged plants. If you are dealing with a situation like a strawberry patch such as mine that is not planted in rows, sprinkle used coffee grinds in and around the plants. Vinegar sprayed on slugs will act much the same way however it is an herbicide so don't spray it on plants or where the over spray will get onto plants.

Iron phosphate sold under brand names like Sluggo work to eradicate slugs without poisons. However, I do not recommend them. My first experience with iron phosphate was when I was just starting a vegetable garden in another house. At that time we had ponds and welcomed toad and frogs as well. We had a lovely fat toad who mysteriously disappeared after using this product. For the rest of that season we had no toads and we fished several birds out of the ponds. So I will not use this product despite the labelling that says it is safe. Now this is just based on my experience but there is evidence that slug pellets are reducing the natural slug predators.

Diatomaceous earth is the mined fossilized remains of dinosaur-era, sea-going creatures called diatoms. On a microscopic level it is incredibly sharp causing cuts on the slugs as they travel over it. The cuts cause the slugs to dehydrate on contact. It is best used around plants that are being damaged by slugs and refreshen after a rain or watering. Diatomaceous earth is a fine powder so a dust mask should be used during application. This is not a solution I would recommend to anyone with respiratory problems since you will be working in and around the plants while the diatomaceous earth is present.

Attracting natural predators for slugs is one of the easiest ways to control them. Natural predators include: frogs, song thrushes, mistle thrushes, redwing blackbirds, ground beetles, Bacillius Thurungiensis, centipedes, fire flies and many birds. Duck and chickens like slugs as well and if you've read this blog you will see I have welcomed my guinea hen visitor because of the insect control. When encouraging natural predators do not use pesticides!

As pests go, slugs are fairly easy to identify either from their dried slime trails or direct spotting. So get out there and slug those slugs!

Happy Gardening!

Garden Gnome
©2007


Tuesday, May 15, 2007

Strawberries


Strawberry Blooms
May 15, 2007

My experience with strawberries is they are very hardy. My June bearing strawberries are now in bloom so it won't be long. The majority of them are housed in a 8' x 10' raised bed. The bed originally was planted with strawberry plants I moved from our old house, planted in a temporary bed then moved to the new raised bed the following year. I do not know what variety they are but talk about tenacity! These plants do not understand the concept of temporary garden beds, raised beds or garden pathways. They have sprouted up in the temporary bed and spread even though I thought I had them all dug and keep pulling them. They have filled the raised bed and spilled over the sides of the raised bed rooting themselves on the paths. I have given away strawberry plants for the past three years and yet I am over run with them! They are like weeds! Needless to say, I am starting several pots to go along with us if we end up moving.

This is a wonderful variety with large, juicy berries. I really don't do much with them other than watering and a heavy application of organic fertilizer after they finished bearing. Once in awhile I toss in a little epsom salt. From there the strawberries live on neglect. I suspect the rabbits or gnomes are giving them more attention than I am!

Happy Gardening!

Garden Gnome
©2007


Thursday, May 10, 2007

Attacting Birds to Your Garden


Ruby Throated Hummingbird
May 10, 2007


Look at my new garden visitor! Isn't he just adorable? This picture was a real fluke as the feeder is hanging on the back porch so I can see any activity from the kitchen window. Well there he was flitting around so I had to grab the camera and take several shots. I should have taken a video clip as well but I was so excited, I didn't think about it. Hummingbirds are attracted to trumpet shaped flowers like trumpet vine and petunias. Not only will they feed on the nectar they will eat insects so these are birds you want in the garden.

I've talked before about attracting beneficial wildlife into the garden while discouraging damaging wildlife. Most birds are beneficial in the garden but even beneficial birds like robins can present a problem if you do not provide them with the essentials. Birds need: shelter, food and water. Provide all three so you do not inadvertently create a problem. Water is very important so provide a couple of sources including a shallow, on the ground water source for bats, another beneficial garden visitor. Control the birds you are trying to attract by what you plant and what you offer for food. If grackles or cowbirds are a problem and they can be, change your feed to something without corn. Safflower seed will attract the cardinals but grackles and cowbirds do not care for it so they will move on. If rodents are a problem, put up more feeders but away from your house. More feeders attract more birds which in turn will attract the predators like the Sharp Shinned hawk. They will keep your rodent population in check naturally. Finches like Niger seed and don't overlook a suet block for the nuthachers. Be sure to pay attention to where the birds like to feed. Some birds prefer feeding at ground level so account for that but quite often there is enough overflow from the feeders to attract ground feeders. Shelter can be provided in the form of birdhouses or natural. If depending on natural shelter place your feeders near the shelter. This gives the birds a place to hide if a predator appears and it gives them a place to nest.

Happy Gardening!

Garden Gnome
©2007